My Forking Life

  • Air Fryer
  • Jamaican
  • Entree
  • Browse Recipes
  • Breakfast
  • Side Dishes
  • About
menu icon
go to homepage
  • Air Fryer
  • Jamaican
  • Entree
  • Browse Recipes
  • Breakfast
  • Side Dishes
  • About
search icon
Homepage link
  • Air Fryer
  • Jamaican
  • Entree
  • Browse Recipes
  • Breakfast
  • Side Dishes
  • About
×
Home

October 12, 2021 by Tanya Harris 25 Comments

Jamaican Recipes

collage of popular jamaican recipes

Add some flavor to your plate with these delicious traditional Jamaican recipes. From breakfast to mains, drinks and sides, these recipes are always super popular! Learn how to cook with Jamaican ingredients and methods for dishes full of flavor and soul. These island recipes are sure to brighten your day!

collage of popular jamaican recipes

These Jamaican recipes are ones that I grew up with, that my Mother would make me, and my go to's when I want some comfort food. Jamaican food is full of bright and vibrant flavors that I just can't get enough of.

A lot of these recipes use traditional cooking techniques, but I've also included some air fryer and Instant Pot recipes as well. Find quick and simple recipes that are easy to make after a busy day at work, and rich and tasty slow-cooked stews that are perfect for the weekend.

Enjoy a taste of the Caribbean!

My Forking Life Jamaican Recipes

Discover new and vibrant flavors with my favorite and most popular Jamaican recipes. Try something new, you'll find lots of inspiration here!

ackee and saltfish in white plate

Ackee and Saltfish

Ackee and saltfish is Jamaica’s national dish. It’s typically served for breakfast on the weekends but can be eaten any time of the day. This recipe is a staple in the Caribbean kitchen.

Air fryer plantains served on a white plate.

Air Fryer Plantains (Fried Sweet Ripe Plantains)

Cooking the most delicious plantains has never been easier than in the air fryer! Quick and easy to cook and prep, they make for one tasty appetizer or serve up as a side with your favorite Caribbean dishes. 

cornmeal porridge in bowl with spoon on side

Jamaican Cornmeal Porridge

Jamaican Cornmeal Porridge is smooth, creamy, and comforting. A popular breakfast dish in Jamaica, this porridge is the perfect recipe to start the day.  This porridge is the breakfast of champions! It’s so comforting and it’ll keep you full and ready to tackle your day. 

callaloo and saltfish.

Callaloo and SaltFish

This Jamaican Callaloo and Saltfish recipe is the perfect main course or side dish for any meal. Generally eaten for breakfast in Jamaica, this delicious dish can be served at any time of the day. 

Image for Quick and Easy Jamaican Banana Fritters

Quick and Easy Jamaican Banana Fritters

These Banana Fritters are a delicious way to use up your ripe bananas. Fried to golden perfection, they are full of flavor and perfect for any meal.

Image for Jamaican Saltfish Fritters

Jamaican Saltfish Fritters

These Jamaican saltfish fritters are a common snack or appetizer. Made with salted cod, and seasoned with fresh scallion, thyme, and scotch bonnet pepper. These fritters are delicious!

jamaican festival ina white bowl

Jamaican Festival (Sweet Dumpling) Recipe

This Jamaican Festival recipe is a homemade version of the popular Jamaican snack. Made with a few simple ingredients, this delicious fried sweet dough is the perfect side dish for your favorite Jamaican recipes.

fried dumplings sitting in bowl with ackee in a bowl to the right

Jamaican Fried Dumplings

Jamaican Fried Dumplings are the perfect side dish when it comes to breakfast, lunch, or dinner. This classic and easy recipe is perfect for any Jamaican meal. 

Image for Jamaican Oxtails Recipe

Jamaican Oxtails Recipe

This Jamaican Oxtails Recipe is fall off the bone tender and full of amazing flavor. It can be made in about an hour with your pressure cooker or cook it low and slow in a slow cooker.

brown stew chicken in pan

Brown Stew Chicken

This Jamaican Brown Stew Chicken is full of Caribbean flavor and a perfect main dish for any day of the week. It’s the perfect stewed chicken dish when you want to have a taste of the islands.

Jamaican curry chicken in blue pot with spoon on side

Jamaican Curry Chicken

This authentic and traditional Jamaican Curry Chicken Recipe is the perfect combination of rich flavors in one plate. This is the Caribbean dish to make when you want a taste of the islands.  Curry chicken was a weeknight meal for us growing up and my mom makes some of the best curry chicken ever!

curry goat in white plate with wooden spoon, white rice, and scotch bonnet peppers on the side

Jamaican Curry Goat

This Jamaican Curry Goat recipe is a flavorful, succulent dish made with Jamaican curry, goat pieces, and other spices. It’s a traditional Jamaican dish that you and your family will love. 

curry shrimp in the pan it was cooked in with rice on the side

Jamaican Curry Shrimp

This Jamaican Curry Shrimp is made with Jamaican curry powder, large succulent shrimp, bell peppers, and coconut milk. It’s a quick and easy curry recipe that’s perfect any day of the week.

jamaican escovitch fish on a plate

Jamaican Escovitch Fish

This classic Jamaican Escovitch Fish recipe is a delicious Caribbean staple. Made with red snapper fish and a colorful pepper and vinegar-based sauce, this is one dish you must make!

jamaican stew peas in bowl with white rice

Jamaican Stew Peas

This Jamaican Stew Peas recipe is pure comfort in a bowl. Made with red kidney beans and flavored with herbs, spices, coconut milk, and stewing meat. This hearty stew is packed with so much flavor. 

Image for Jamaican Instant Pot Rice and Beans

Jamaican Instant Pot Rice and Beans

This Jamaican Instant Pot Rice and Beans recipe is generally called “rice and peas” on the island. It’s made with red kidney beans, coconut milk, and added spices.  Make it in your Instant Pot Pressure Cooker for perfect results. 

finished photo of spice bun

Jamaican Spice Bun

This Jamaican Spice Bun is usually served with cheese and served during the Easter holiday. I eat it year round, don’t judge me. It’s a delicious bread recipe that is a part of the Jamaican Culture and can easily be made at home.

corned beef and cabbage on the side

Corned Beef and Cabbage - Jamaican Style

This quick and easy Corned Beef & Cabbage Recipe, Jamaican style, is our go to recipe for busy weeknights. It’s a flavorful and quick traditional recipe. 

Jerk chicken served on a plate with lime wedges.

Jamaican Jerk Chicken (Air Fryer, Oven, or Grill)

Add some flavor to your dinner with this delicious Jamaican jerk chicken recipe. It takes minutes to prep and can be cooked in the air fryer, oven, or grill for a delicious bite to suit any occasion.

air fryer jamaican jerk pork recipe on a cutting board. This Air Fried Jamaican Jerk Pork Recipe is delicious and flavorful. Only 2 ingredients and easy to make for an easy weeknight dinner. Have a taste of the Caribbean with this tried and true method. #airfryer #airfryerrecipes #Jamaicanrecipes #Caribbeanrecipe

Air Fried Jamaican Jerk Pork Recipe

This Air Fried Jamaican Jerk Pork Recipe has amazing flavor and can be made right in your air fryer. A great way to travel to the Caribbean in your very own home.

jamaican style carrot juice recipe

Jamaican Style Carrot Juice Recipe

This Jamaican Style Carrot Juice Recipe is a refreshing yet sweet treat. One of my favorite drinks when growing up in Jamaica.

Image for Jamaican Rum Punch Recipe

Jamaican Rum Punch Recipe

This Jamaican Rum Punch Recipe is the perfect drink for the summer. It’s delicious and refreshing and the perfect drink to bring you to the Caribbean. 

sorrel drink in glass

Jamaican Sorrel Drink

This Jamaican sorrel drink is a traditional Caribbean beverage made with the sepals of the Roselle plant, a species of the hibiscus flower. This drink is served over ice and it’s traditionally served during the Christmas Holiday. It’s refreshing, easy to make, and full of flavor.

Two white bowls filled with goat, tripe and vegetable soup, with spoons, and Scotch bonnet peppers set alongside.

Mannish Water

Mannish Water is an irresistibly delicious Jamaican soup brimming with flavors and textures. Packed full of tender goat meat, aromatic herbs, vegetables and an irresistibly complex blend of spices, it guarantees to tantalize any adventurous palate!

boiled green banana on white plate

Boiled Green Bananas

Boiled green bananas are a delicious staple of Caribbean cuisine, offering a hearty yet starchy texture similar to potatoes with an inexhaustibly sweet note. When served alongside proteins such as fish or jerk chicken, they make for an outstandingly balanced side dish, soaking up sauces like those found in Jamaican cuisine for an enjoyable and filling meal.

cooked jamaican dumpling on blue plate

Jamaican Boiled Dumplings

Boiled dumplings are a delicious yet effortless meal, made from dough crafted with flour, salt, and water, then cooked until they achieve the perfect soft doughy texture. Perfect as an accompaniment to stews, soups, or gravies alike.

Image for Mackerel Rundown

Mackerel Rundown

Mackerel Rundown is a classic Jamaican dish of flaked mackerel simmered in a flavorful coconut milk-based sauce with vibrant spices for an irresistibly satisfying island-style meal. Enjoyed best when served alongside rice, boiled dumplings, or green bananas; its unique and satisfying flavors make this delicious seafood meal truly enjoyable.

October 12, 2021 by Tanya Harris Leave a Comment

Homemade Horseradish Sauce

Close up of horseradish sauce in a bowl net to fresh herbs.

Add some flavor and heat to your plate with this delicious and creamy homemade horseradish sauce. Perfect to serve with roasted beef, this homemade condiment is a wonderful addition to a holiday table.

Close up of horseradish sauce in a bowl net to fresh herbs.

This post contains affiliate links, please read my full disclaimer here.

You’ll find the full recipe with ingredient amounts and instructions in the recipe card at the bottom of this post. Be sure to check out the blog post itself for extra tips and tricks!

There are a few must have condiments for my holiday table, cranberry sauce, mustard and this homemade horseradish sauce.

If you usually by pre-made horseradish sauce from the store, you HAVE to give this homemade version a go this year. It takes minutes to make with just a few simple ingredients, and it can be made several days ahead of time.

It's a strong condiment, with a mustard-like hit that is wonderful when served with roasted beef, or use as a spread in your favorite sandwiches.

Be sure to try my Chimichurri Sauce and Jerk BBQ Sauce too!

How to make homemade horseradish sauce

  • Gather your ingredients.
Ingredients to make the recipe.
  • Combine ingredients in a bowl. Place in the refrigerator and allow to chill for at least 4 hours. Serve and enjoy.
Overhead shot of a bowl of homemade horseradish sauce.

How long does it keep?

Once you have made your horseradish sauce, cover it and keep it refrigerated. It will keep well for around a week in the fridge, depending on the freshness of your sour cream. The flavors will develop the longer you leave it, and I recommend that you leave it in the fridge for at least 4 hours before you serve it.

Do you use fresh or jarred horseradish?

You can use either in this sauce. Fresh horseradish root looks a little like ginger and can be found in the produce section of your store. If using fresh, peel the root and then grate it before mixing with the other ingredients. You can also use jarred horseradish which is usually found in the condiment aisle near the pickles.

Why make your own horseradish sauce?

This creamy horseradish sauce is so much more flavorful than store-bought, and you'll likely have most of the ingredients to hand to make it, so it's also kinder on your purse/wallet. It's also really easy to adjust it to suit your exact tastes, add more or less horseradish depending on how spicy you like it.

Homemade horseradish sauce in a white bowl with a spoon.

Recipe Notes and Tips

  • This sauce is best when chilled in the fridge to allow the flavors to mend together.
  • When grating fresh horseradish, take care as it can burn your eyes, I also like to wear gloves.
  • If you have a good food processor or blender, you can use that instead of grating the horseradish by hand.
  • This recipe is easily doubled if you are serving it for a bigger feast.

More Sauce Recipes

  • Homemade BBQ Sauce
  • Tartar Sauce
  • Cocktail Sauce
  • Homemade Remoulade Sauce
Close up of horseradish sauce in a bowl net to fresh herbs.
Print Recipe
4.50 from 2 votes

Homemade Horseradish sauce

Add some flavor and heat to your plate with this delicious and creamy homemade horseradish sauce. Perfect to serve with roasted beef, this homemade condiment is a wonderful addition to a holiday table.
Prep Time5 minutes mins
Total Time5 minutes mins
Course: Condiment
Cuisine: American
Keyword: easy horseradish recipe, horseradish sauce for beef, how to make horseradish sauce
Servings: 4 servings
Calories: 60kcal
Author: Tanya Harris

Ingredients

  • ½ cup sour cream
  • 2 Tablespoons horseradish
  • 1 teaspoon apple cider vinegar
  • ½ teaspoon kosher salt
  • ⅛ teaspoon onion powder
  • ⅛ teaspoon black pepper

Instructions

  • Combine ingredients in a bowl. Place in the refrigerator and allow to chill for at least 4 hours. Serve and enjoy.

Notes

  • This sauce is best when chilled in the fridge to allow the flavors to mend together.
  • Serve this sauce on top of roast or use it as a spread on a sandwich.
  • This sauce is best when chilled in the fridge to allow the flavors to mend together.
  • When grating fresh horseradish, take care as it can burn your eyes, I also like to wear gloves.
  • If you have a good food processor or blender, you can use that instead of grating the horseradish by hand.
  • This recipe is easily doubled if you are serving it for a bigger feast.

Nutrition

Calories: 60kcal | Carbohydrates: 2g | Protein: 1g | Fat: 6g | Saturated Fat: 3g | Polyunsaturated Fat: 1g | Monounsaturated Fat: 1g | Cholesterol: 15mg | Sodium: 345mg | Potassium: 61mg | Fiber: 1g | Sugar: 1g | Vitamin A: 180IU | Vitamin C: 2mg | Calcium: 37mg | Iron: 1mg

October 5, 2021 by Tanya Harris 6 Comments

Air Fryer Beef Tenderloin

Beef tenderloin sliced and ready to serve.

Cook the most perfect beef tenderloin quickly and effortlessly in the air fryer. Cooked with a mayonnaise, garlic and and herb rub, it's perfectly tender and so easy to cook to exactly your tastes. If you want to impress, this is foolproof!

Beef tenderloin sliced and ready to serve.

This post contains affiliate links, please read my full disclaimer here.

You’ll find the full recipe with ingredient amounts and instructions in the recipe card at the bottom of this post. Be sure to check out the blog post itself for extra tips and tricks!

If cooking beef perfectly feels like a daunting task, then you need to try this easy air fryer method for beef tenederloin. Yes, you read that right...I roasted beef in my air fryer!

It's so easy to cook the beef exactly to your tastes and extra juicy. It takes minutes to prep too and is quick to cook, so as well as being a great effortless holiday dinner, you can easily enjoy this after a busy day too.

Rubbed and seasoned with garlic, herbs, and mayonnaise, which helps to add richness and lock in the juices, the perfect beef tenderloin has never been easier!

Be sure to try my Air Fryer Steak and Air Fryer Steak Fajitas too!

Three slices or air fryer beef tenderloin on a plate with potatoes and red cabbage.

How to make air fryer beef tenderloin

  • Gather your ingredients.
Ingredients to make the recipe.
  • Remove beef tenderloin from the fridge and allow it to sit at room temperature for 30 minutes.
  • Combine mayonnaise, kosher salt, rosemary, thyme, garlic cloves and black pepper in a bowl and stir to combine. Rub mixture all over the beef tenderloin.
Beef tenderloin rubbed with the mayonnaise and herb mixture.
  • Place tenderloin in the air fryer basket and cook on 250 degrees Fahrenheit until the internal temperature of the middle of the filet reaches the desired temperature as listed below. It should take about 30 minutes to reach an internal temperature of 125 degrees Fahrenheit for a medium-rare roast.
  • Once the tenderloin reaches the desired pull temperature (refer to chart below), remove the tenderloin from the air fryer basket and tent with foil. Allow tenderloin to rest for 10-15 minutes before slicing and serving.
  • The tenderloin in the air fryer.
  • The cooked beef tenderloin in the air fryer basket.

How long do you cook beef tenderloin in an air fryer?

As with a lot of recipes, especially meats, it's best to use an instant-read thermometer to make sure that it is cooked exactly to your liking. In this recipe, the beef is cooked at 250F and the cooking times for doneness are listed below. We pull the beef from the air fryer slightly before it reaches the top temperature as it will continue to cook as it rests.

DonenessPull Temp.Doneness Temp.Approx. cook time
Rare115F-120F120F-125F27 minutes
Medium rare125F-130F130F-135F30 minutes
Medium135F-140F140F-145F33 minutes
Medium well145F-150F150F-155F35 minutes
Well done155F or higher160F or higher38 minutes

What's the best seasoning for beef?

You can of course mix up the seasonings you use to rub the beef if you like. I used garlic, rosemary, thyme, salt, and pepper. I rubbed the tenderloin with mayonnaise, which for me is a must. It adds a really rich flavor and also helps to form a delicious crust. You could also use butter or simply season it without any additional fat.

What do you serve it with?

This is a great main course as an alternative to Thanksgiving turkey, or it's a perfect centerpiece for your Christmas dinner. Top it with a homemade horseradish sauce or serve it up with all of your favorite sides like:

  • Gravy without Drippings
  • Air Fryer Carrots
  • Garlic Mashed Potatoes
  • Southern Candied Sweet Potatoes
Close up of sliced beef on a plate with vegetable and potato sides.

Recipe Notes and Tips

  • I suggest cooking the tenderloin anywhere between a medium-rare or medium temperature for tender roast.
  • Allow the beef to come up to room temperature before cooking. I like to take it out of the fridge at least half an hour before rubbing it.
  • Once cooked, place the beef on a chopping board and cover loosely with foil for at least 10 to 15 minutes before slicing it.

More Air Fryer Recipes

  • Seasoned Air Fryer Turkey Wings
  • Air Fryer Whole Fish
  • The Best Air Fryer Lamb Chops
  • Air Fryer Scallops

Watch this video tutorial and see how I make this beef tenderloin from start to finish.

Beef tenderloin sliced and ready to serve.
Print Recipe
5 from 2 votes

Air Fryer Beef Tenderloin

Cook the most perfect beef tenderloin quickly and effortless in the air fryer. Cooked with a mayonnaise, garlic and and herb rub, it's perfectly tender and so easy to cook to exactly your tastes. If you want to impress, this is foolproof!
Prep Time5 minutes mins
Cook Time30 minutes mins
Total Time35 minutes mins
Course: Main Course
Cuisine: American
Keyword: air fried beef tenderloin, air fryer beef recipe, how to cook beef tenderloin in the air fryer
Servings: 4 servings
Calories: 370kcal
Author: Tanya Harris

Ingredients

  • 2 lbs beef tenderloin roast

Rub

  • 2 Tablespoons mayonnaise
  • 1 Tablespoon kosher salt
  • 1 Tablespoon fresh Rosemary minced (or 2 teaspoons dried Rosemary)
  • 2 teaspoons fresh thyme minced (or 1 teaspoon dried)
  • 2 garlic cloves minced
  • 1 teaspoon black pepper

Instructions

  • Remove beef tenderloin from the fridge and allow it to sit at room temperature for 30 minutes.
  • Combine mayonnaise, kosher salt, rosemary, thyme, garlic cloves and black pepper in a bowl and stir to combine. Rub mixture all over the beef tenderloin.
  • Place tenderloin in the air fryer basket and cook on 250 degrees Fahrenheit until the internal temperature of the middle of the filet reaches the desired temperature as listed below. It should take about 30 minutes to reach an internal temperature of 125 degrees Fahrenheit for a medium-rare roast.
  • Once the tenderloin reaches the desired pull temperature (refer to chart below), remove the tenderloin from the air fryer basket and tent with foil. Allow tenderloin to rest for 10-15 minutes before slicing and serving.

Notes

  • I suggest a quick read thermometer to check on the temperature of the roast to determine doneness. You’ll want to remove the roast from the air fryer when it’s about 5 degrees below your desired doneness temperature. The temperature of the roast will continue to rise once it’s removed from the air fryer. 
  • I suggest cooking the tenderloin anywhere between a medium-rare or medium temperature for tender roast.
  • Refer to the chart below for desired temperature. The times provided are approximate times and will vary depending on the roast, air fryer brand, etc. Start checking the temperature of the roast at about 30 minutes. 
 
Doneness
Pull Temp.
Doneness Temp.
Approx. Cook Time
Rare
115F-120F
120F-125F
27 minutes
Medium rare
125F-130F
130F-135F
30 minutes
Medium
135F-140F
140F-145F
33 minutes
Medium well
145F-150F
150F-155F
35 minutes
Well done
155F or higher
160F or higher
38 minutes

Nutrition

Calories: 370kcal | Carbohydrates: 1g | Protein: 51g | Fat: 17g | Saturated Fat: 5g | Polyunsaturated Fat: 4g | Monounsaturated Fat: 6g | Trans Fat: 1g | Cholesterol: 144mg | Sodium: 1916mg | Potassium: 797mg | Fiber: 1g | Sugar: 1g | Vitamin A: 70IU | Vitamin C: 2mg | Calcium: 55mg | Iron: 5mg

October 4, 2021 by Tanya Harris 2 Comments

Carrot Soufflé

Carrot souffle in a white dish served on to two plates.

If you are looking for a side dish to impress this Thanksgiving or Christmas, look no further than this oven baked carrot souffle. Simple to prep with a few basic ingredients, it's a wonderful addition to your holiday dinners!

Carrot souffle in a white dish served on to two plates.

This post contains affiliate links, please read my full disclaimer here.

You’ll find the full recipe with ingredient amounts and instructions in the recipe card at the bottom of this post. Be sure to check out the blog post itself for extra tips and tricks!

We all know that Thanksgiving is all about the side dishes, if you are looking to try something new this year, this carrot souffle is a sure fire hit.

Simple and easy to make, it's perfectly sweet, and is one tasty ways to serve carrots to the table. Made with a few simple ingredients, you'll likely have to hand already, it takes minutes to prep and the cooking time is hands off, leaving you free to get on with the rest of the show stopping meal.

Be sure to try my Air Fryer Carrots and Southern Candied Sweet Potatoes too!

A wooden spoon serving the souffle.

How to make carrots souffle

  • Preheat the oven to 350 degrees Fahrenheit. Grease a 1.5 quart souffle dish or an 8x8 pan and set aside.
  • Place carrots in a medium sized pan and cover with water. Place over medium-high heat and bring to a boil, reduce heat to medium, cover, and allow to simmer for 15-20 minutes, or until the carrots are tender. Once tender, drain the carrots and set aside.
Carrot chunks being cooked in a pan.
  • Add cooked carrots, eggs, light brown sugar, melted butter, all-purpose flour, baking powder, vanilla extract, salt, and ground nutmeg to a blender and blend until smooth.
  • Ingredients in a blender.
  • The ingredients blended together.
  • Pour into the prepared dish and bake in the preheated oven for 45-50 minutes, until the souffle is set. Remove from the oven and allow to cool for about 10 minutes before serving. Sprinkle with powdered sugar at this time if you like. Enjoy.
  • The carrot mix poured into a baking dish.
  • Overhead shot of the carrot souffle served to the table.

Can you make it ahead of time?

This carrot souffle is best served as soon as it's ready so that it's nice and light and fluffy. You can prep the mixture a day or two ahead of time and keep it covered in the fridge til ready to cook. If you do have leftovers, they will keep well for 3 to 4 days and can be reheated in the oven at 400F for 10 minutes to serve.

Is this vegetable side dish sweet?

Yes, this is most definitely a sweet rather than savory side dish. If you love sweet potato casserole then you'll adore this! Sweetened with brown sugar and seasoned with vanilla and nutmeg, it's the perfect addition to your plate.

How do I know this carrot soufflé is done?

You can jiggle the dish and if it's very liquidy in the middle, it needs more time. If it's set and doesn't jiggle, it's ready. You can also check the middle with a toothpick (like I did here lol). The toothpick won't come out clean, but there will be a pudding-like consistency stuck to the toothpick. Checking with a toothpick will slightly deflate the soufflé.

What do you serve it with?

This carrot souffle is a perfect side to serve with your Thanksgiving or Christmas meal. It's perfect to serve with roasted meats, chicken, and turkey. Try it with:

  • Roasted Air Fryer Turkey Breast
  • Sous Vide Filet Mignon
  • Thanksgiving Chicken
  • Seasoned Air Fryer Turkey Wings

Be sure to serve it alongside your other favorite sides like Garlic Mashed Potatoes and Giblet Gravy too!

A carrot souffle topped with powdered sugar.

Recipe Notes and Tips

  • Your carrots should be fork tender when cooked so that they combine easily with the other ingredients.
  • To make this dish gluten-free, you can swap the all purpose flour of a gluten-free 1:1 flour.
  • Make sure that the carrot mix is well blended and smooth. If you don't have a powerful blender, you may need to scrape the sides down a few times.
  • I recommend using regular medium-sized carrots rather than baby carrots in this recipe as the carrot flavor is more pronounced in medium sized-carrots.

More Vegetable Side Dishes

  • Sautéed Shredded Brussels Sprouts
  • Marinated Air Fryer Vegetables
  • Slow Cooker Garlic Herb Mushrooms
  • Creamed Corn
A carrot souffle topped with powdered sugar.
Print Recipe
5 from 1 vote

Carrot Soufflé

If you are looking for a side dish to impress this Thanksgiving or Christmas, look no further than this oven baked carrot souffle. Simple to prep with a few basic ingredients, it's a wonderful addition to your holiday dinners!
Prep Time10 minutes mins
Cook Time1 hour hr 5 minutes mins
Total Time1 hour hr 15 minutes mins
Course: Side Dish
Cuisine: American
Keyword: Baked carrots, how to make carrot souffle, sweet carrot side dish
Servings: 6 servings
Calories: 341kcal
Author: Tanya Harris

Ingredients

  • 1.5 lbs peeled and chopped carrots chopped into 1 inch chunks
  • 3 large eggs
  • ¾ cup packed light brown sugar
  • ½ cup butter melted and cooled
  • ¼ cup all-purpose flour
  • 1 ½ teaspoons baking powder
  • 1 teaspoon vanilla extract
  • ½ teaspoon salt
  • ½ teaspoon ground nutmeg
  • Powdered sugar optional

Instructions

  • Preheat the oven to 350 degrees Fahrenheit. Grease a 1.5 quart souffle dish or an 8x8 pan and set aside.
  • Place carrots in a medium sized pan and cover with water. Place over medium-high heat and bring to a boil, reduce heat to medium, cover, and allow to simmer for 15-20 minutes, or until the carrots are tender. Once tender, drain the carrots and set aside.
  • Add cooked carrots, eggs, light brown sugar, melted butter, all-purpose flour, baking powder, vanilla extract, salt, and ground nutmeg to a blender and blend until smooth. Pour into the prepared dish and bake in the preheated oven for 45-50 minutes, until the souffle is set. Remove from the oven and allow to cool for about 10 minutes before serving. Sprinkle with powdered sugar at this time if you like. Enjoy.

Notes

  • Your carrots should be fork tender when cooked so that they combine easily with the other ingredients.
  • To make this dish gluten-free, you can swap the all purpose flour of a gluten-free 1:1 flour.
  • Make sure that the carrot mix is well blended and smooth. If you don't have a powerful blender, you may need to scrape the sides down a few times.
  • I recommend using regular medium-sized carrots rather than baby carrots in this recipe as the carrot flavor is more pronounced in medium sized-carrots.
  • The powdered sugar as garnish is optional in this recipe. It will make your soufflé a tad bit sweeter. 

Nutrition

Calories: 341kcal | Carbohydrates: 43g | Protein: 5g | Fat: 18g | Saturated Fat: 10g | Polyunsaturated Fat: 1g | Monounsaturated Fat: 5g | Trans Fat: 1g | Cholesterol: 123mg | Sodium: 447mg | Potassium: 543mg | Fiber: 3g | Sugar: 32g | Vitamin A: 19536IU | Vitamin C: 7mg | Calcium: 122mg | Iron: 1mg

October 2, 2021 by Tanya Harris 4 Comments

Air Fryer Plantains (Fried Sweet Ripe Plantains)

Air fryer plantains served on a white plate.

Cooking the most delicious plantains has never been easier than in the air fryer! Quick and easy to cook and prep, they make for a tasty appetizer or a side with your favorite Caribbean dishes.

The cooked plantains served on a white plate.

This post contains affiliate links, please read my full disclaimer here.

You’ll find the full recipe with ingredient amounts and instructions in the recipe card at the bottom of this post. Be sure to check out the blog post itself for extra tips and tricks!

Fried plantains have got to be one of my favorite sides, but I don't cook them that often at home as they do require quite a lot of oil, but no more thanks to our trusty air fryer!

This recipe is perfect for breakfast, a quick snack, an appetizer, or a side dish. It only takes a few minutes to prepare and 10 minutes to cook. All you need is plantains and a small amount of oil.

I usually eat them for breakfast, sandwiching them between two slices of bread with a fried egg. Yum! Properly ripe plantains are sweeter than green plantains and perfect when accompanied by something salty.

Serve them alongside my Jamaican Jerk Chicken for one delicious meal!

Close up of the plantains in the air fryer basket.

Ingredients needed for plantains in the air fryer

  • Ripe plantain - a sweet and savory type of banana. It can be fried, baked, or boiled. The riper the plantain, the softer and sweeter your fried plantain will be.
  • High heat oil spray - A cooking oil with a high smoke point that is ideal for searing, frying, and other high-temperature cooking methods. I prefer to use avocado oil or olive oil.

How to make air fryer plantains

Peel and slice your plantains. You want to make sure the plantains you choose are ripe.

Four step by step photos to show how to peel and cut the plantains.

Place the plantain slices into the air fryer basket in a single layer and then spray with oil.

Plantain slices in the air fryer basket.

Cook on 380 degrees Fahrenheit for 8 minutes, flipping and spraying halfway through.

Once 8 minutes are up, increase the temperature to 400 degrees Fahrenheit and cook for 1-2 minutes.

Remove and enjoy.

The plantains in the air fryer basket after being cooked.

How long do they keep?

These air fryer plantains are best enjoyed as soon as they are ready so that they have crispy outsides and are soft in the middle. If you do have leftovers, they will keep well for a couple of days in the fridge and are easily reheated. Reheat them in the air fryer basket at 380F for 2 to 3 minutes to crisp them back up again.

What plantains are best to use?

This recipe works best with ripe plantains, ones that are mostly black but still have a small amount of yellow on the skins. Ripe plantains are sweeter. Ones that are all black are overripe, and although they will still be good to eat, they will be very soft and will be trickier to cut nicely.

Green or mostly yellow plantains will have a firmer texture and they can be quite tricky to peel, they are also less sweet.

Are plantains healthy?

Plantains are technically fruits, but like tomatoes, are eaten and served as a vegetable. They are starchy and an amazing source of fiber and low in fat. They contain lots of vitamins, minerals, and antioxidants, and because we air fry these plantains, you don't need to add a lot of oil to get them nice and crispy. These are a great food to incorporate into a well-balanced diet. This recipe is also vegan and gluten-free.

A hand placing a plate of air fried plantains on a table.

Recipe Notes and Tips

  • You’ll want to use ripe plantains for this recipe. I like to wait until the plantain has become mostly black, then slice and use.
  • You can also cook store bought frozen plantains in the air fryer. For frozen plantains, I place frozen plantains in the air fryer basket and cook on 380 degrees for 12-14 minutes. I do not spray these with oil as most frozen plantains have been partially fried in oil.
  • Preheat the air fryer before cooking the plantain slices. If your air fryer doesn't have a preheat function, let it run at 380F while you peel and cut the plantains.
  • Some air fryer models can run slightly differently, and depending on how thickly you cut the slices the cooking times may vary.

More Air Fryer Recipes

  • Seasoned Air Fryer Turkey Wings
  • Baked Air Fryer Apples
  • Crispy Air Fryer Eggplant
  • Air Fryer Granola
Air fryer plantains served on a white plate.
Print Recipe
5 from 5 votes

Air Fryer Plantains (Fried Sweet Ripe Plantains)

Cooking the most delicious plantains has never been easier than in the air fryer! Quick and easy to cook and prep, they make for one tasty appetizer, or serve up as a side with your favorite Caribbean dishes.
Prep Time3 minutes mins
Cook Time10 minutes mins
Total Time13 minutes mins
Course: Side Dish
Cuisine: American
Keyword: air fried plantain recipe, how to air fry plantains, plantain side dish
Servings: 2 servings
Calories: 126kcal
Author: Tanya Harris

Ingredients

  • 1 ripe plantain peeled and sliced into thick chunks
  • Oil for spraying avocado, canola, olive oil

Instructions

  • Place peeled plantain slices into the air fryer basket in a single layer and then spray with oil.
  • Cook on 380 degrees Fahrenheit for 8 minutes, flipping and spraying halfway through.
  • Once 8 minutes are up, increase temperature to 400 degrees Fahrenheit and cook an additional 1-2 minutes.
  • Remove and enjoy.

Video

Notes

  • You’ll want to use ripe plantains for this recipe. I like to wait until the plantain has become mostly black, then slice and use.
  • You can also cook store bought frozen plantains in the air fryer. For frozen plantains, I place frozen plantains in the air fryer basket and cook on 380 degrees for 12-14 minutes. I do not spray these with oil as most frozen plantains have been partially fried in oil.
  • Preheat the air fryer before cooking the plantain slices. If your air fryer doesn't have a preheat function, let it run at 380F while you peel and cut the plantains.
  • Some air fryer models can run slightly differently, and depending on how thickly you cut the slices the cooking times may vary.

Nutrition

Calories: 126kcal | Carbohydrates: 29g | Protein: 1g | Fat: 2g | Saturated Fat: 2g | Polyunsaturated Fat: 1g | Monounsaturated Fat: 1g | Sodium: 4mg | Potassium: 447mg | Fiber: 2g | Sugar: 13g | Vitamin A: 1009IU | Vitamin C: 16mg | Calcium: 3mg | Iron: 1mg

September 27, 2021 by Tanya Harris 4 Comments

Cauliflower Wings (3 Flavors)

cauliflower wings on sheetpan lined with foil pan with cauliflower, celery, and box of reynolds wrap on top

These cauliflower wings are the perfect appetizer. These wings are baked - not fried - and are flavored through and through. You can serve them plain or choose any of these 3 flavors: BBQ, Buffalo, or Teriyaki.

cauliflower wings on sheet pan lined with reynolds wrap foil paper

This post contains affiliate links, please read my full disclaimer here.

You’ll find the full recipe with ingredient amounts and instructions in the recipe card at the bottom of this post. Be sure to check out the blog post itself for extra tips and tricks!

I’m excited to partner with Reynolds Wrap® for this post.

In our house, we love all kinds of wings. Chicken wings would often make a presence at our dinner table, but now cauliflower wings have made their presence known. Move over chicken wings, cauliflower wings are here to stay! 

Once I had cauliflower wings at a popular restaurant, I knew I had to try making them at home. I changed up the traditional method of making these wings by baking them rather than frying them, seasoning the batter so that they’re delicious right out of the oven, and coating them in panko breadcrumbs for an extra crispy finish. 

I use Reynolds Wrap® Non-Stick Foil for this recipe so that my wings don’t stick to the foil. The dull side of the non-stick foil with the watermark should always be facing up; that's the non-stick side. This allows the cauliflower to easily be removed from the pan before tossing them in the sauce. Plus, lining the pan with foil makes cleanup a breeze.

I’ve provided 3 homemade sauces for these cauliflower wings because homemade sauces are my favorite. Use one of the recipes listed below or toss these wings in your favorite sauce.

close up photo of buffalo cauliflower wings

How to Make Cauliflower Wings

First, break your cauliflower into florets and gather all your other ingredients. Preheat your oven to 425 degrees Fahrenheit. 

ingredients for cauliflower wings

Then, line a large sheet pan with Reynolds Wrap® Non-Stick Foil. Make sure the dull side is up as this is the side that is non-stick.

hand lining sheet pan with foil paper

Combine all-purpose flour, garlic powder, onion powder, paprika, salt, and pepper in a large mixing bowl and whisk to combine. Slowly whisk in the milk until you get a loose batter. 

Pour the panko breadcrumbs into a separate dish.

Place the cauliflower florets in the wet batter, coating all sides and shaking off any excess. Then place them in the panko breadcrumbs, making sure all sides are coated. 

collage of batter being mixed and then dredged in cauliflower

Place the coated florets on the lined baking sheet in a single layer, making sure not to overcrowd them. Bake in the preheated oven for 23-25 minutes, until browned on the outside.

collage of cauliflower wings before being baked and after

While the cauliflower wings are baking, prepare your sauce by combining the sauce ingredients in a small saucepan on the stovetop. Once wings are done baking, toss them in the sauce and place them back on the lined sheet pan and bake for an additional 5 minutes until done.

sauced cauliflower wings on baking sheet lined with foil

Serve your wings and Enjoy! Reynolds Wrap® has a new package that is easier to open and a tab that keeps the box fully closed for storing after use!  There is also a color-coded system making the product easier to find, look for the yellow design for Reynolds Wrap® Non-Stick Foil.

Tips for Cauliflower Wings

  • Use Reynolds Wrap® Non-Stick Foil so the food doesn’t stick - When baking these wings with Reynolds Wrap®  Non-Stick Foil, no food sticks to the foil. This allows your cauliflower wings to stay intact and not break while preparing. The wings and the sauce will lift easily off the foil. 
  • Make sure cauliflower florets are even sizes - This will allow your florets to cook evenly in the oven. 
  • If you want extra crispy cauliflower wings, use the sauce as a dipping sauce instead - Once you toss these wings in the sauce, they won’t be as crispy. If you want really crunchy cauliflower wings, follow the recipe as is but rather than tossing the wings in the sauce, serve the sauce on the side as a dipping sauce. Or enjoy these wings plain, the seasoned batter provides tons of flavor. 
  • Prepare your sauces from scratch or use your favorite sauce - I have provided recipes for 3 of our favorite homemade sauces for these wings. You can toss the cauliflower wings in one of these or your favorite sauce.

Can you make these wings ahead of time?

  • Absolutely! Just prepare the wings and the sauce as instructed, but store the plain baked cauliflower wings and sauce separately in the fridge. When ready to serve, toss the wings in the sauce and heat in the oven on 375 degrees Fahrenheit for 8-10 minutes. 
cauliflower wings on baking sheet lined with foil
cauliflower wings on sheetpan lined with foil pan with cauliflower, celery, and box of reynolds wrap on top
Print Recipe
5 from 2 votes

Cauliflower Wings (3 Flavors)

These cauliflower wings are the perfect appetizer. These wings are baked - not fried - and are flavored through and through. You can serve them plain or choose any of these 3 flavors; BBQ, Buffalo, or teriyaki.
Prep Time10 minutes mins
Cook Time23 minutes mins
Total Time33 minutes mins
Course: Appetizer
Cuisine: American
Keyword: cauliflower wings
Servings: 4 people
Author: Tanya Harris

Ingredients

Cauliflower Wings

  • Reynolds Wrap® Non-Stick Foil
  • 1 medium head of cauliflower broken into florets (about 4-5 cups)
  • 1 cup all-purpose flour
  • 1.5 teaspoon garlic powder
  • 1 teaspoon onion powder
  • 1 teaspoon paprika
  • 1 teaspoon salt
  • ½ teaspoon black pepper
  • 1 cup milk
  • 2 cups panko bread crumbs

Sauces:

BBQ Sauce

  • 1 cup ketchup
  • 3 Tablespoons molasses
  • 3 Tablespoons brown sugar
  • 2 Tablespoons apple cider vinegar
  • 1 Tablespoon Worcestershire sauce
  • 2 teaspoons onion powder
  • 1 teaspoon chili powder
  • 1 teaspoon dry mustard
  • ½ teaspoon cayenne pepper
  • ½ teaspoon salt
  • ½ teaspoon liquid smoke

Buffalo Sauce

  • ¾ cup hot sauce
  • 2 Tablespoons unsalted butter
  • ½ Tablespoon white vinegar
  • ¼ teaspoon Worcestershire sauce
  • ⅛ teaspoon garlic powder

Teriyaki Sauce

  • ½ cup orange juice
  • ½ cup water
  • ¼ soy sauce
  • ¼ cup brown sugar
  • 2 Tablespoons honey
  • ½ teaspoon ginger powder
  • ¼ teaspoon garlic powder
  • ¼ cup water optional
  • 2 Tablespoons cornstarch optional

Instructions

Cauliflower Wings:

  • Line a large sheet pan with Reynolds Wrap® Non-Stick Foil, making sure the dull side (the non-stock side) is facing up. Preheat the oven to 425°F.
  • Wash and cut cauliflower head into bite-sized pieces/florets.
  • In a large bowl, mix all-purpose flour, garlic powder, onion powder, paprika, salt, and black pepper until combined. Slowly whisk in the milk until you get a loose batter.
  • Pour the panko breadcrumbs into a separate dish.
  • Place the cauliflower florets in the wet batter, coating all sides and shaking off any excess. Then place the cauliflower florets in the panko breadcrumbs, making sure all sides are coated.
  • Place the florets on the lined baking sheet in a single layer, making sure not to overcrowd them. Bake in the preheated oven for 23-25 minutes, until browned on the outside.
  • While the wings are baking, prepare your sauce by combining sauce ingredients in a small pot on the stovetop. Once wings are done baking, toss them in the sauce and place them back on the sheet pan and bake for an additional 5 minutes until done.

Sauce:

  • Combine sauce ingredients in a saucepan over medium-high heat and bring to a simmer. Reduce heat and allow sauce to simmer over medium-low heat for about 5 minutes. Remove and toss over the wings before placing back into the oven.
  • To thicken the Teriyaki sauce, thicken the sauce by making a cornstarch slurry. Whisk ¼ cup water and 2 tablespoon cornstarch in a separate container. Pour the slurry into the simmering liquid and allow to simmer for an additional 1-2 minutes.

September 21, 2021 by Tanya Harris 8 Comments

BBQ Mac and Cheese

Two bowls of mac and cheese topped with BBQ sauce.

Everyone's favorite, mac and cheese has had one delicious makeover! This BBQ mac and cheese recipe is made with shredded BBQ and seasoned with BBQ sauce before being baked to perfection. It's rich, cheesy, creamy, and tangy. It's the perfect comfort food!

Two bowls of mac and cheese topped with BBQ sauce.

This post contains affiliate links, please read my full disclaimer here.

You’ll find the full recipe with ingredient amounts and instructions in the recipe card at the bottom of this post. Be sure to check out the blog post itself for extra tips and tricks!

Just when you thought mac and cheese couldn't get any better, along comes BBQ mac and cheese! Stop what you are doing and make this immediately!

This recipe is the most perfect comfort food, rich and hearty, cheesy and tangy, every bite is a real treat!

The oven-baked macaroni cheese is loaded with BBQ pork, or chicken, a lot of cheese, and of course your favorite BBQ sauce. This is one hearty, indulgent and comforting dish that the whole family will love!

Be sure to try my Seafood Mac and Cheese and Creamy Air Fryer Mac and Cheese too!

A wooden spoon serving the BBQ mac and cheese.

How to make BBQ Mac and Cheese

  • Gather your ingredients.
Ingredients to make the recipe.
  • Preheat the oven to 350 degrees Fahrenheit. Grease a 9x13 pan and set aside.
  • Bring a large pot of salted water to a boil and add macaroni and cook until al dente, according to the directions on the macaroni box. This should be about 8-9 minutes. Drain and set aside in a large bowl.
  • Combine milk and heavy cream in a large measuring cup or glass. Set aside.
  • In a separate medium-sized pot, melt butter over medium heat. Sprinkle flour in the pot and whisk for 1-2 minutes, until the flour smells toasty. Slowly whisk in milk/cream mixture. Allow to simmer until thickened, whisking often. This should take about 5 minutes.
  • Remove from heat and stir in 2 cups of shredded cheese and the ½ cup bbq sauce. Taste the sauce and add salt and pepper if desired.
  • Butter melting in a pot.
  • flour added to the melted butter.
  • Whisking the flour.
  • Pouring in the milk.
  • The sauce being stirred with a wooden spoon.
  • Cheese and BBQ sauce added to the sauce.
  • Pour sauce over drained macaroni and stir until the macaroni is covered. Add 1 cup of cooked BBQ and stir until combined.
  • The sauce being poured over the macaroni.
  • The cheese sauce stirred into the macaroni.
  • Pour mixture into the 9x13 baking pan and top with remaining cooked BBQ, bbq sauce, and cheese. Place in the preheated oven and bake for 15-20 minutes, until the cheese is bubbly.
The mac and cheese topped with more cheese and BBQ pork.
  • To brown the cheese on top, place the oven on broil for 3-4 minutes until the cheese on top has browned. Remove from the oven and top with remaining bbq sauce and allow to cool for 10 minutes. Serve and enjoy.
The BBQ mac and cheese after being baked.

Can you make it ahead of time?

This BBQ mac and cheese is so delicious served straight out of the oven, but the leftovers are just as tasty! Once baked, let the dish cool and then cover or transfer to an airtight container. It will keep well for around four days and you can reheat it at 360F with the top covered with foil for around 15 minutes to warm it through.

What's the best protein to use?

This mac and cheese recipe is great with either BBQ shredded pork or BBQ chicken. You can buy store bought for ease or make your own favorite recipe. For a meat-free version, you can simply omit the meat, it will still have all of that delicious BBQ flavor.

What do you serve it with?

A big bowl of this mac and cheese is perfect served by itself in a big bowl, and it's delicious paired with your favorite sides. try it with:

  • Cornbread Muffins
  • Honey Whole Wheat Dinner Rolls
  • Creamed Corn
  • Seasoned Air Fryer Asparagus
Close up of BBQ mac and cheese.

Recipe Notes and Tips

  • Elbow macaroni is perfect for this recipe, but any short pasta like bow tie or penne will work well.
  • Sharp cheddar cheese adds a wonderful flavor, though other shredded cheese like Jack or mozzarella will work well.
  • The pasta should be cooked al dente. If it's overcooked, the final dish can become quite soggy.
  • Cook the pasta in heavily salted water to add flavor to the dish right from the beginning.

More Pasta Recipes

  • Rasta Pasta
  • Creamy Cajun Chicken Pasta
  • White Cheddar Pressure Cooker Pasta
  • Instant Pot Chicken Spaghetti
Two bowls of mac and cheese topped with BBQ sauce.
Print Recipe
4.25 from 4 votes

BBQ Mac and Cheese

Everyone's favorite, mac and cheese has had one delicious makeover! This BBQ mac and cheese recipe is made with BBQ shredded meat and seasoned with BBQ sauce before being baked to perfection.
Prep Time15 minutes mins
Cook Time35 minutes mins
Total Time50 minutes mins
Course: Main Course
Cuisine: American
Keyword: baked bbq mac and cheese, bbq pork mac and cheese, mac and cheese with bbq sauce
Servings: 8 servings
Calories: 791kcal
Author: Tanya Harris

Ingredients

  • 16 oz dried elbow macaroni
  • ½ cup unsalted butter
  • ½ cup all-purpose flour
  • 2 cups milk
  • 1 cup heavy cream
  • 3 cups shredded sharp cheddar cheese separated
  • ½ cup bbq sauce plus more for garnish
  • 2 cups cooked BBQ pork or chicken
  • Salt and pepper to taste

Instructions

  • Preheat the oven to 350 degrees Fahrenheit. Grease a 9x13 pan and set aside.
  • Bring a large pot of salted water to a boil and add macaroni and cook until al dente, according to the directions on the macaroni box. This should be about 8-9 minutes. Drain and set aside in a large bowl.
  • Combine milk and heavy cream in a large measuring cup or glass. Set aside.
  • In a separate medium-sized pot, melt butter over medium heat. Sprinkle flour in the pot and whisk for 1-2 minutes, until the flour smells toasty. Slowly whisk in milk/cream mixture. Allow to simmer until thickened, whisking often. This should take about 5 minutes.
  • Remove from heat and stir in 2 cups of shredded cheese and the ½ cup bbq sauce. Taste the sauce and add salt and pepper if desired.
  • Pour sauce over drained macaroni and stir until the macaroni is covered. Add 1 cup of cooked BBQ and stir until combined.
  • Pour mixture into the 9x13 baking pan and top with remaining cooked BBQ, bbq sauce, and cheese. Place in the preheated oven and bake for 15-20 minutes, until the cheese is bubbly.
  • To brown the cheese on top, place the oven on broil for 3-4 minutes until the cheese on top has browned. Remove from the oven and top with remaining bbq sauce and allow to cool for 10 minutes. Serve and enjoy.

Notes

  • Elbow macaroni is perfect for this recipe, but any short pasta like bow tie or penne will work well.
  • Sharp cheddar cheese adds a wonderful flavor, though other shredded cheese like Jack or mozzarella will work well.
  • The pasta should be cooked al dente. If it's overcooked, the final dish can become quite soggy.
  • Cook the pasta in heavily salted water to add flavor to the dish right from the beginning.

Nutrition

Calories: 791kcal | Carbohydrates: 70g | Protein: 29g | Fat: 44g | Saturated Fat: 26g | Polyunsaturated Fat: 2g | Monounsaturated Fat: 11g | Trans Fat: 1g | Cholesterol: 147mg | Sodium: 846mg | Potassium: 324mg | Fiber: 2g | Sugar: 19g | Vitamin A: 1444IU | Vitamin C: 1mg | Calcium: 446mg | Iron: 2mg

September 16, 2021 by Tanya Harris 31 Comments

Jamaican Festival (Sweet Dumpling) Recipe

jamaican festival ina white bowl

This Jamaican Festival recipe is a homemade version of the popular Jamaican snack. Made with a few simple ingredients, this delicious fried sweet dough is the perfect side dish for your favorite Jamaican recipes. 

jamaican festival ina white bowl

This post contains affiliate links, please read my full disclaimer here.

You’ll find the full recipe with ingredient amounts and instructions in the recipe card at the bottom of this post. Be sure to check out the blog post itself for extra tips and tricks!

When I say festival, I don’t mean a party. But then again, it’s always a party when I show up with my homemade festival! Ha! All jokes aside, this Jamaican festival recipe is the truth and I worked on it to make sure it was as delicious as the ones I had as a child. 

Jamaican festival is a sweet fried dough made with cornmeal, flour, sugar, salt, vanilla extract, and milk. The dough comes together quite easily and all you have to do is deep fry it. It goes well with some of my favorite Jamaican recipes like rasta pasta, jerk chicken, ackee and saltfish, or escovitch fish. 

How to make Jamaican Festival

First, gather your ingredients. You’ll want to start heating a heavy bottom pot of oil that has at least 3 inches of oil in it or use a deep fryer if you have one. Turn the heat over medium heat until the temperature reaches 350 degrees Fahrenheit. 

ingredients for festival

Prepare your festival dough by adding the all-purpose flour, cornmeal, granulated sugar, baking powder, and salt to a large bowl and stirring to combine.

dru ingredients for festival in a white bowl

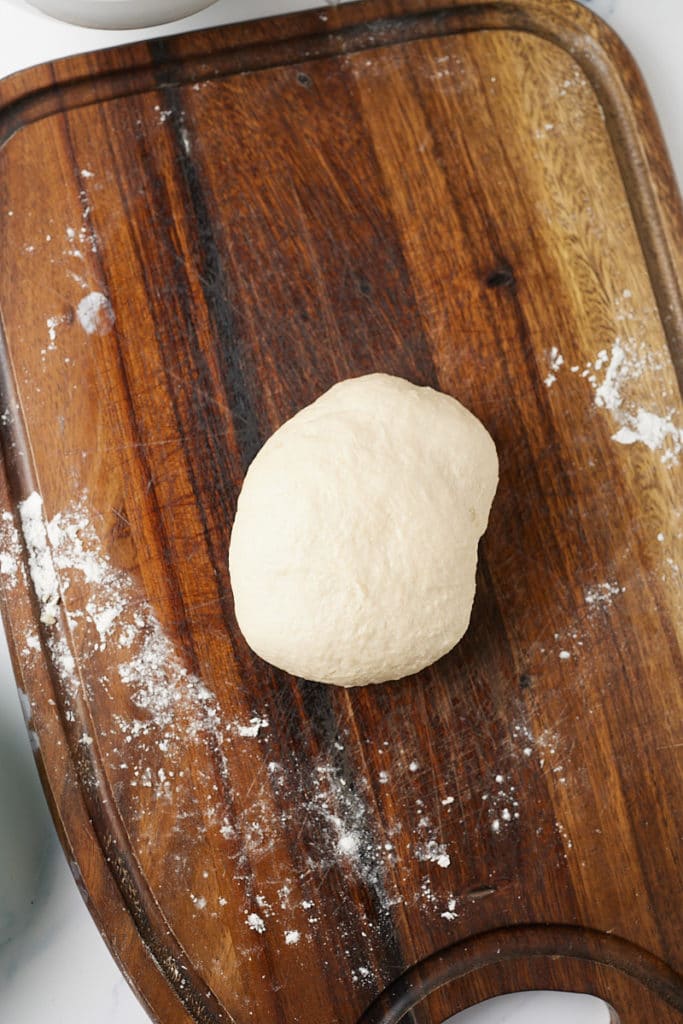
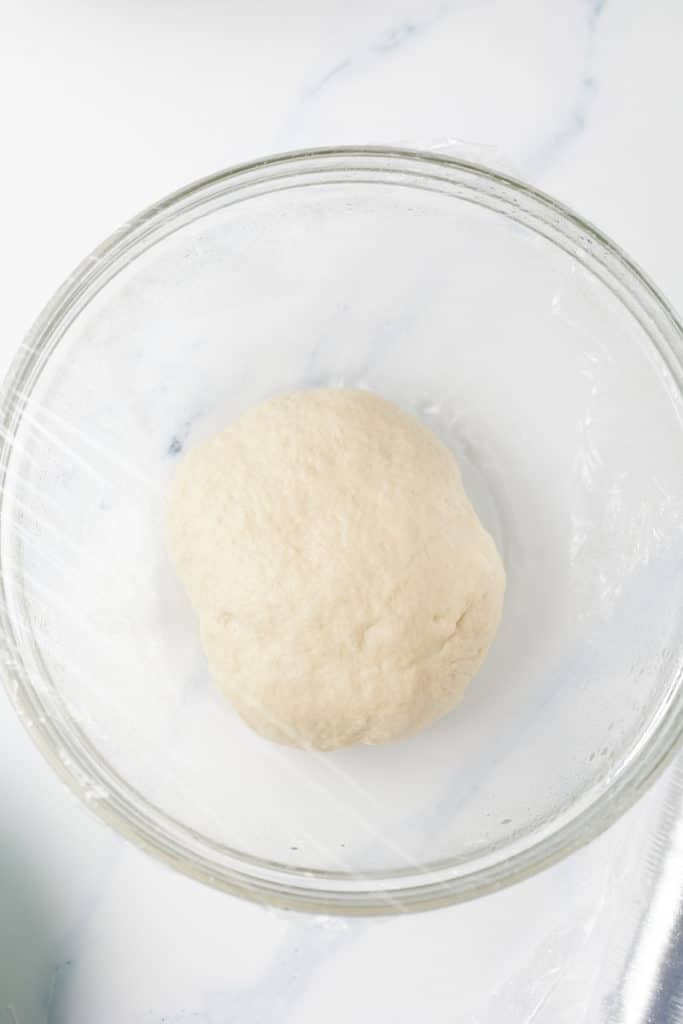
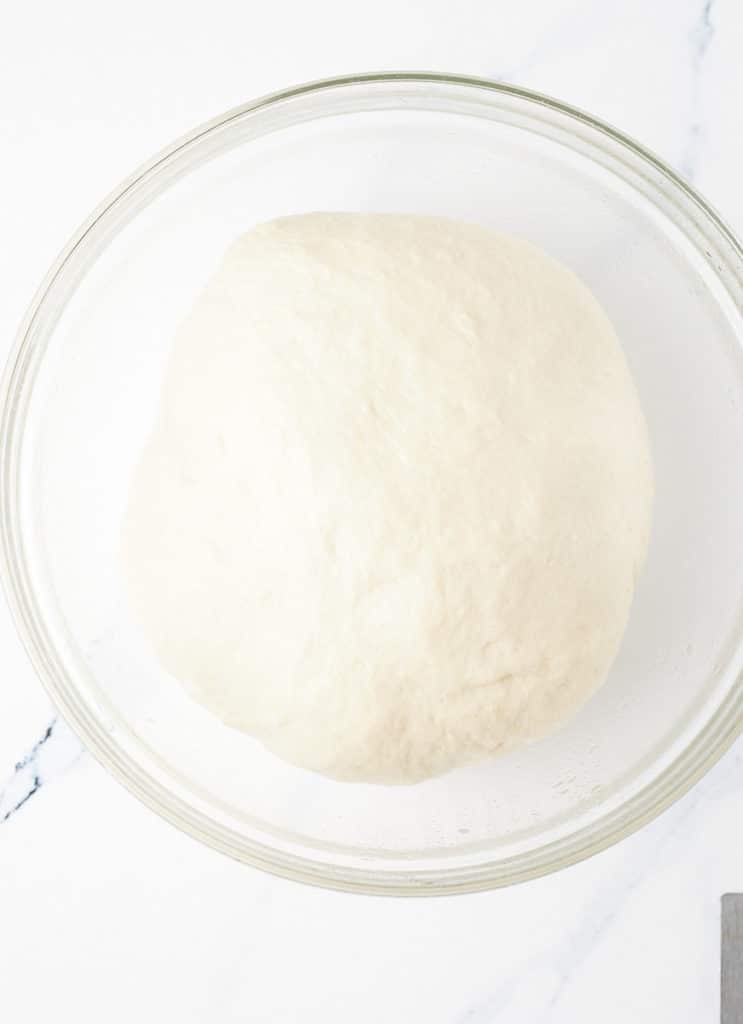
Add the vanilla extract and milk and stir until the dough comes together. Then use your hands to lightly form the mixture into a ball. 

festival dogh rolled into ball

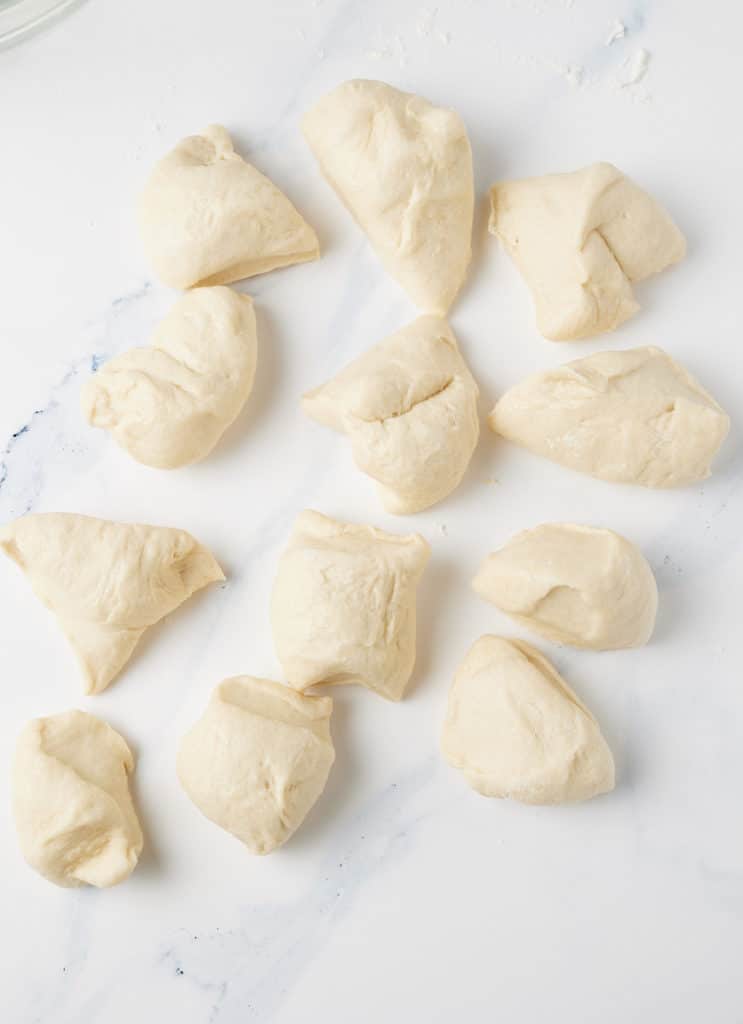
Pinch off pieces of dough and roll them into long oval shapes. Make about 12 dumplings. 

festival dough rolled into long oval shape in hand

Once the oil has reached the temperature of 350 degrees Fahrenheit, fry the dough on all sides, until golden brown. This should take about 4-6 minutes.

jamaican festival dough being deep fried

Remove dough and drain off any excess grease. 

fried festival draining on wire rack

Serve and enjoy. 

fried festival dough in plate with one broken to see inside

What does festival taste like?

Festival is like a combination of sweet cornbread and hushpuppies mixed together. It’s light and fluffy and sweetened to perfection. 

Notes on Jamaican Festival

  • Make sure your oil is set to the proper temperature for deep frying. I use a thermometer to ensure my oil is at 350 degrees Fahrenheit.
  • Festival is best eaten when it's made. The dough can be made a day ahead.
  • The amount of milk added may depend on the brand of flour used. You may need a little more or a little less. Slowly stir in the milk until the flour is moistened and can easily form into a ball of dough. 
  • I don't recommend making festival in an air fryer. I tried and it was not as good.

Looking for other Jamaican recipes? Try these out:

  • Jamaican Fried Dumpling
  • Cornmeal Porridge
  • Oxtail
  • Curry Chicken
  • Curry Goat
  • Brown Stew Chicken
fried festival dough in plate with one broken to see inside
Print Recipe
4.72 from 21 votes

Jamaican Festival (Sweet Dumpling) Recipe

This Jamaican Festival recipe is a homemade version of the popular Jamaican snack. Made with a few simple ingredients, this delicious fried sweet dough is the perfect side dish for your favorite Jamaican recipes.
Prep Time10 minutes mins
Cook Time6 minutes mins
Total Time16 minutes mins
Course: Side Dish
Cuisine: Caribbean
Keyword: jamaican festival, jamaican festival recipe
Servings: 12 dumplings
Calories: 117kcal
Author: Tanya Harris

Ingredients

  • 1 ½ cups all-purpose flour
  • ½ cup fine cornmeal
  • 6 Tablespoons granulated sugar
  • 2 teaspoons baking powder
  • 1 teaspoon vanilla extract
  • ½ teaspoon salt
  • ¾ cup milk a little less or more may be needed, see notes
  • Oil for deep frying*

Instructions

  • Heat a heavy bottom pot of oil that has at least 3 inches of oil in it or use a deep fryer if you have one. Turn the heat over medium heat until the temperature reaches 350 degrees Fahrenheit.
  • Add the all-purpose flour, cornmeal, granulated sugar, baking powder, and salt to a large bowl and stir to combine.
  • Add the vanilla extract and milk and stir until the dough comes together. Then use your hands to lightly form the mixture into a ball.
  • Pinch off pieces of dough and roll them into long oval shapes. Make about 12 dumplings.
  • Once the oil has reached the temperature of 350 degrees Fahrenheit, fry the dough on all sides, until golden brown. This should take about 4-6 minutes.
  • Remove dough and drain off any excess grease. Serve and enjoy.

Notes

  • Make sure your oil is set to the proper temperature for deep frying. I use a thermometer to ensure my oil is at 350 degrees Fahrenheit.
  • Festival is best eaten when it's made. The dough can be made a day ahead.
  • The amount of milk added may depend on the brand of flour used. You may need a little more or a little less. Slowly stir in the milk until the flour is moistened and can easily form into a ball of dough.
  • I don't recommend making festival in an air fryer. I tried and it was not as good.

Nutrition

Calories: 117kcal | Carbohydrates: 24g | Protein: 3g | Fat: 1g | Saturated Fat: 1g | Polyunsaturated Fat: 1g | Monounsaturated Fat: 1g | Cholesterol: 2mg | Sodium: 105mg | Potassium: 126mg | Fiber: 1g | Sugar: 7g | Vitamin A: 25IU | Calcium: 49mg | Iron: 1mg

September 15, 2021 by Tanya Harris 5 Comments

Classic Jamaican Escovitch Fish: A Family Favorite

jamaican escovitch fish on a plate

This classic Jamaican Escovitch Fish recipe is a delicious Caribbean staple. Made with red snapper fish and a colorful pepper and vinegar-based sauce, this is one dish you must make!

escovitch fish filet with festival in background

This post contains affiliate links, please read my full disclaimer here.

You’ll find the full recipe with ingredient amounts and instructions in the recipe card at the bottom of this post. Be sure to check out the blog post itself for extra tips and tricks!

Growing up near the beach has its perks. My stepdad loved to fish and would bring home all kinds of fish. Escovitch fish made an appearance quite often in our house, and it would never disappoint.

Escovitch fish is a popular dish in Jamaica. Traditionally, it's made with seasoned whole red snapper fish fried in oil to make the skin crispy before being topped with a mixture of onions and bell peppers, scotch bonnet pepper, and vinegar. Sometimes the fish is marinated in the vinegar marinade overnight.

Rather than frying my fish, I choose to air fry it, a suggestion given to me by my aunt. This is how she makes her escovitch fish, and it is delicious.

If you don’t have an air fryer, the fish can still be fried in oil on the stovetop before adding the sauce. 

🧂 Ingredients Needed

Ingredient amounts and full recipe instructions are on the printable recipe card at the bottom of the post.

  • For the Fish: Whole red snapper, canola oil, fish seasoning (or a mix of salt, black pepper, garlic powder, etc.)
  • For the Escovitch Sauce: White distilled vinegar, yellow onion, carrot, green bell pepper, red bell pepper, scotch bonnet pepper, dried thyme, allspice, granulated sugar, black pepper

🔪 Essential Tools

  • Sharp knife
  • Cutting board
  • Large skillet or frying pan (or air fryer)
  • Tongs or fish spatula
  • Saucepan (for escovitch sauce)
  • Paper towels (for drying and draining fish)

How to make Jamaican Escovitch Fish

First, gather your ingredients and prep your whole fish. I like to wash the fish in water with lime juice, remove any remaining scales, cut the fins, and pat the outside of the fish dry. I do this same process for my air fryer whole fish recipe.

ingredients for escovitch fish

Season the fish with a little oil and dry seasonings. I use my homemade fish seasoning but you can use whatever seasoning you like, like salt, black pepper, and garlic powder. 

If using the air fryer, place the fish in the air fryer basket and cook at 400 degrees Fahrenheit for 14-16 minutes. If your whole fish is too large to fit in the basket, cut it in half.  

seasoned fish in air fryer basket before cooking
cooked fish filet in air fryer basket

Meanwhile, make your escovitch sauce on the stove while the fish is cooking. Place a large sauté pan over medium heat. Add two tablespoons of vinegar, onion, carrot, green and red bell pepper, and scotch bonnet pepper. Sauté the onions and peppers until slightly softened, about 3 minutes. 

peppers that were sauteed in vinegar

Add the remaining vinegar, dried thyme, allspice, granulated sugar, and black pepper. Simmer over medium heat for 4-5 minutes. 

peppers in vinegar sauce and seasoning

When the fish is done, place it on a platter and pour the escovitch sauce over the fish.

jamaican escovitch fish on a plate

That's it, you've made escovitch fish!

To fry the fish on the stovetop

If needed, you can fry the fish on the stovetop and get the crispy skin. Prepare the fish by cleaning it and seasoning in it with fish seasoning.

Heat canola oil in a large skillet over medium-high heat, until the oil, reaches 350 degrees Fahrenheit. Fry the fish in the oil on both sides for about 5-6 minutes.

Remove the fish. Prepare the escovitch sauce in a separate pan.

To oven roast the fish

Before adding the escovitch sauce, you can roast the fish in a hot oven. Season the fish as instructed and roast in a 425-degree Fahrenheit oven for about 20-25 minutes.

What exactly is escovitch fish?

Escovitch fish is Jamaica's version of marinated fish and peppers. It's usually made with red snapper fish, although other fish can also be used. My family makes it with whole fish rather than fish fillets. However, you can use fish fillets if needed.

What do you eat escovitch fish with?

Whatever you like! I usually eat escovitch fish with rice, fried dumplings, or Jamaican festival.

Can this be made ahead of time?

Yes! You can make the vinegar sauce up to a few days in advance. The fish can be cooked and stored up to 3-4 days in advance.

Notes

  • The scotch bonnet pepper in this recipe makes the dish slightly spicy. If you aren't a fan of spice, leave the scotch bonnet pepper out. If you can't find scotch bonnet pepper, a habanero pepper makes a great substitute.
  • You can marinate the fish in the dry seasonings overnight in the fridge if you have time. It gives the dish even more flavor.

Looking for other Jamaican recipes? Check these out.

  • Ackee and Saltfish
  • Brown Stew Chicken
  • Jamaican Curry Chicken
  • Jamaican Rice and Peas
  • Rasta Pasta
jamaican escovitch fish on a plate
Print Recipe
5 from 4 votes

Jamaican Escovitch Fish

This classic Jamaican Escovitch fish recipe is a delicious Caribbean staple. Made with red snapper fish and a colorful pepper and vinegar-based sauce, this is one dish you must make!
Prep Time10 minutes mins
Cook Time15 minutes mins
Total Time25 minutes mins
Course: Main Course
Cuisine: Caribbean
Keyword: escovitch fish, jamaican escovitch fish
Servings: 2 people
Calories: 137kcal
Author: Tanya Harris

Ingredients

  • 1 whole red snapper fish about 1.5 lbs, scaled and gutted
  • ½ Tablespoon canola oil more if frying on the stove*
  • 1.5 Tablespoons fish seasoning

Escovitch Sauce

  • 1 cup white distilled vinegar separated
  • 1 yellow onion sliced
  • 1 carrot peeled and sliced
  • 1 green bell pepper sliced
  • 1 red bell pepper sliced
  • 1 scotch bonnet pepper sliced, seeds and membrane removed
  • 1 teaspoon dried thyme
  • ½ teaspoon allspice
  • ½ teaspoon granulated sugar
  • ⅛ teaspoon black pepper

Instructions

Air Frying the Fish

  • Rub oil over fish and season the fish with fish seasoning on the outside and inside.
  • Place fish in the air fryer basket and cook on 400 degrees Fahrenheit for 14-16 minutes or until the internal temperature of the thickest part reaches at least 145F and the inside of the fish is flaky.

For Stovetop Frying

  • You can fry the fish on the stovetop and get the crispy skin if needed. Prepare the fish by washing the fish in water with lime juice, remove any remaining scales, cut the fins, and pat the outside of the fish dry. Season the fish with the seasonings.
    Heat enough canola oil in a large skillet to cover half of the fish filets over medium-high heat, until the oil, reaches 350 degrees Fahrenheit. Fry the fish in the oil on both sides, about 5-6 minutes on each side.
    Remove the fish. Prepare the escovitch sauce in a separate pan.

Escovitch Sauce

  • Meanwhile, while the fish is cooking, make your escovitch sauce on the stove. Place a large sauté pan over medium heat. Add 2 tablespoons of vinegar, onion, carrot, green and red bell pepper, and scotch bonnet pepper. Sauté the onions and peppers until slightly softened, about 3 minutes. 
  • Add the remaining vinegar, dried thyme, allspice, granulated sugar, and black pepper. Simmer over medium heat for 4-5 minutes.
  • When the fish is done, place it on a platter and pour the escovitch sauce over the fish. Serve and enjoy.

Video

Notes

  • The scotch bonnet pepper in this recipe makes the dish slightly spicy. If you aren't a fan of spice, leave the scotch bonnet pepper out. If you can't find scotch bonnet pepper, a habanero pepper makes a great substitute.
  • You can marinate the fish in the dry seasonings overnight in the fridge if you have time. It gives the dish even more flavor.

Nutrition

Calories: 137kcal | Carbohydrates: 19g | Protein: 2g | Fat: 4g | Saturated Fat: 1g | Polyunsaturated Fat: 1g | Monounsaturated Fat: 2g | Trans Fat: 1g | Sodium: 32mg | Potassium: 458mg | Fiber: 5g | Sugar: 9g | Vitamin A: 7328IU | Vitamin C: 138mg | Calcium: 84mg | Iron: 2mg

September 14, 2021 by Tanya Harris 3 Comments

Holiday Mulled Wine

Mulled wine served in a mug with a cinnamon stick and orange slice.

This easy mulled wine recipe is a classic holiday drink. Red wine is heated with orange, spices and maple syrup, and with a touch of brandy, for a cozy and warming drink for adults only! Instructions included for both Slow cooker and stovetop methods.

Mulled wine served in a mug with a cinnamon stick and orange slice.

This post contains affiliate links, please read my full disclaimer here.

You’ll find the full recipe with ingredient amounts and instructions in the recipe card at the bottom of this post. Be sure to check out the blog post itself for extra tips and tricks!

As the holiday season approaches, there's no better way to unwind and get cozy than with some homemade mulled wine. It's so easy to make from scratch and it's perfect for all of your Christmas parties.

Red wine is seasoned with cinnamon, orange, whole cloves, and star anise and sweetened with a little maple syrup for a warming alcoholic drink.

I've included instructions for both the Crockpot and stovetop, both methods are very straightforward. Your only regret will be that you didn't make double!

Be sure to try my Sangria and Jamaican Sorrel too!

How to make holiday mulled wine

  • Gather your ingredients and spices. I only use three kinds of whole spices in my mulled wine.
Spices needed for the recipe.
  • Use a peeler and strip a few slices of the orange peel from the orange. Cut the orange in half and juice the orange.
  • Add wine, juice from the orange, orange peel, cloves, cinnamon sticks, star anise, and maple syrup to a 4-quart saucepan and place over medium heat. When the mixture begins to lighlty bubble, reduce the heat to low and cover with a tight fitting lid. I do this when I see one or two bubbles.
Red wine and spices in a pot.
  • Allow to cook over low heat with the lid on for about 30 minutes. Remove from heat and pour the liquid into a fine mesh strainer that has been placed over a bowl. Discard the whole spices and orange peel.
The strained spices and orange peel.
  • Serve the wine in mugs. Enjoy!
Two cups of holiday mulled wine.

Can you make mulled wine in a slow cooker?

Yes, you can easily make this holiday drink in your Crockpot too! It's a great option if you want to make it ahead of a party. Follow the stovetop instructions, but place on low heat in the slow cooker for 1 to 2 hours. The full instructions can be found at the bottom of the post.

Can you reheat mulled wine?

Yes! Mulled wine can be made up to 3 days ahead of time, so feel free to double the recipe! Once it has been made and strained, let it cool and keep it in a container in the fridge. Reheat it gently on the stovetop to warm through before serving.
Can you drink it cold?

Mulled wine is best served warm, it can still be drunk cold if you like, but the flavors of the spices will be a lot less subtle.

This holiday wine drink is best served in ceramic or porcelain mugs, so that you can drink it without your hands becoming too hot. Glass mugs will also work well.

Red mulled wine in a white mug.

Recipe Notes and Tips

  • Use a bold and fruity wine to make this recipe. A Merlot, Cabernet Sauvignon or Shiraz are all great choices. The wine doesn't have to be expensive, but use one you would normally drink.
  • Don't be tempted to add more spices, or the finished drink can be quite overpowering.
  • The maple syrup can be substituted for honey or brown sugar.
  • Make sure that you don't bring the wine to a boil. Alcohol evaporates at 172 degrees Fahrenheit (78°C) which could result in less potent wine and a bitter drink.

More Drinks Recipes

  • Homemade Cranberry Lemonade
  • Jamaican Rum Punch
  • Slow Cooker Holiday Punch
Mulled wine served in a mug with a cinnamon stick and orange slice.
Print Recipe
5 from 1 vote

Holiday Mulled Wine

This easy mulled wine recipe is a classic holiday drink. Red wine is heated with orange, spices and maple syrup, and with a touch of brandy, for cosy and warming drink that's for adults only!
Prep Time5 minutes mins
Cook Time35 minutes mins
Total Time40 minutes mins
Course: Drinks
Cuisine: American
Keyword: homemade mulled wine, how to make mulled wine, slow cooker mulled wine, stovetop mulled wine
Servings: 4 servings
Calories: 226kcal
Author: Tanya Harris

Ingredients

  • 1 750 milliliter bottle of wine Merlot or Cabernet Sauvignon
  • 1 medium orange rinsed and dried
  • ½ Tablespoon whole cloves
  • 2 cinnamon sticks
  • 2 whole star anise
  • 2 Tablespoon maple syrup
  • 2 Tablespoons brandy

Instructions

Stovetop:

  • Use a peeler and strip a few slices of the orange peel from the orange. Cut the orange in half and juice the orange.
  • Add wine, juice from the orange, orange peel, cloves, cinnamon sticks, star anise, and maple syrup to a 4-quart saucepan and place over medium heat. When the mixture begins to lightly bubble, reduce the heat to low and cover with a tight fitting lid.
  • Allow to simmer over low with the lid on for about 30 minutes. Remove from heat and pour the liquid into a fine mesh strainer that has been placed over a bowl. Discard the whole spices and orange peel. Serve the wine in mugs. Enjoy!

Slow cooker:

  • Use a peeler and strip a few slices of the orange peel. Cut the orange in half and juice the orange.
  • Add wine, juice from the orange,orange peel, cloves, cinnamon sticks, star anise, and maple ingredients in a 4-quart slow cooker. Cook on low heat for 1-2 hours. When ready to serve, pour the liquid into a fine mesh strainer that has been placed over a bowl. Discard the whole spices and orange peel. Serve the wine in mugs. Enjoy!

Notes

  • Use a bold and fruity wine to make this recipe. A Merlot, Cabernet Sauvignon or Shiraz are all great choices. The wine doesn't have to be expensive, but use one you would normally drink.
  • Don't be tempted to add more spices, or the finished drink can be quite overpowering.
  • The maple syrup can be substituted for honey or brown sugar.
  • Make sure that you don't bring the wine to a boil. Alcohol evaporates at 172 degrees Fahrenheit (78°C) which could result in less potent wine and a bitter drink.
Nutrition

Calories: 226kcal | Carbohydrates: 17g | Protein: 1g | Fat: 1g | Saturated Fat: 1g | Polyunsaturated Fat: 1g | Monounsaturated Fat: 1g | Sodium: 10mg | Potassium: 339mg | Fiber: 2g | Sugar: 10g | Vitamin A: 85IU | Vitamin C: 18mg | Calcium: 62mg | Iron: 1mg
  • « Previous Page
  • 1
  • …
  • 46
  • 47
  • 48
  • 49
  • 50
  • …
  • 73
  • Next Page »
tanya holding bowl and mixing

Welcome!

Welcome to My Forking Life! Hi, I'm Tanya, an attorney, busy wife and mom, and lover of quick, easy, and delicious meals.

More about me

Popular Recipes

  • Jamaican Oxtails Recipe
  • Air fryer fried chicken on a white platter
    Air Fryer Fried Chicken
  • brown stew chicken in pan
    Brown Stew Chicken
  • Jamaican Instant Pot Rice and Beans

Holiday Favorites

  • sweet potato pie on a plate
    Southern Sweet Potato Pie Recipe
  • spoon lifting gravy out of gravy dish
    Easy Recipe for Gravy without Drippings
  • Stirring the giblet gravy with a spoon.
    Grandma's Giblet Gravy Recipe
  • creamy baked macaroni and cheese, the best baked macaroni and cheese, creamy mac and cheese
    Creamy Baked Macaroni and Cheese
as seen on...various online websites text listed

Footer

↑ back to top
  • Privacy Policy
  • Contact
  • About Tanya

As an Amazon Associate, I earn from qualifying purchases.

Copyright © 2026 My Forking Life

Rate This Recipe

Your vote:


Let us know what you thought of this recipe:

This worked exactly as written, thanks!
My family loved this!
Thank you for sharing this recipe

Or write in your own words:

A rating is required
A name is required
An email is required