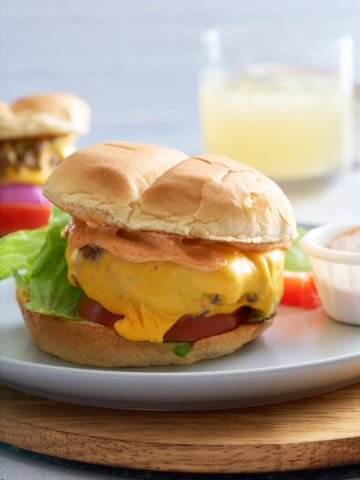
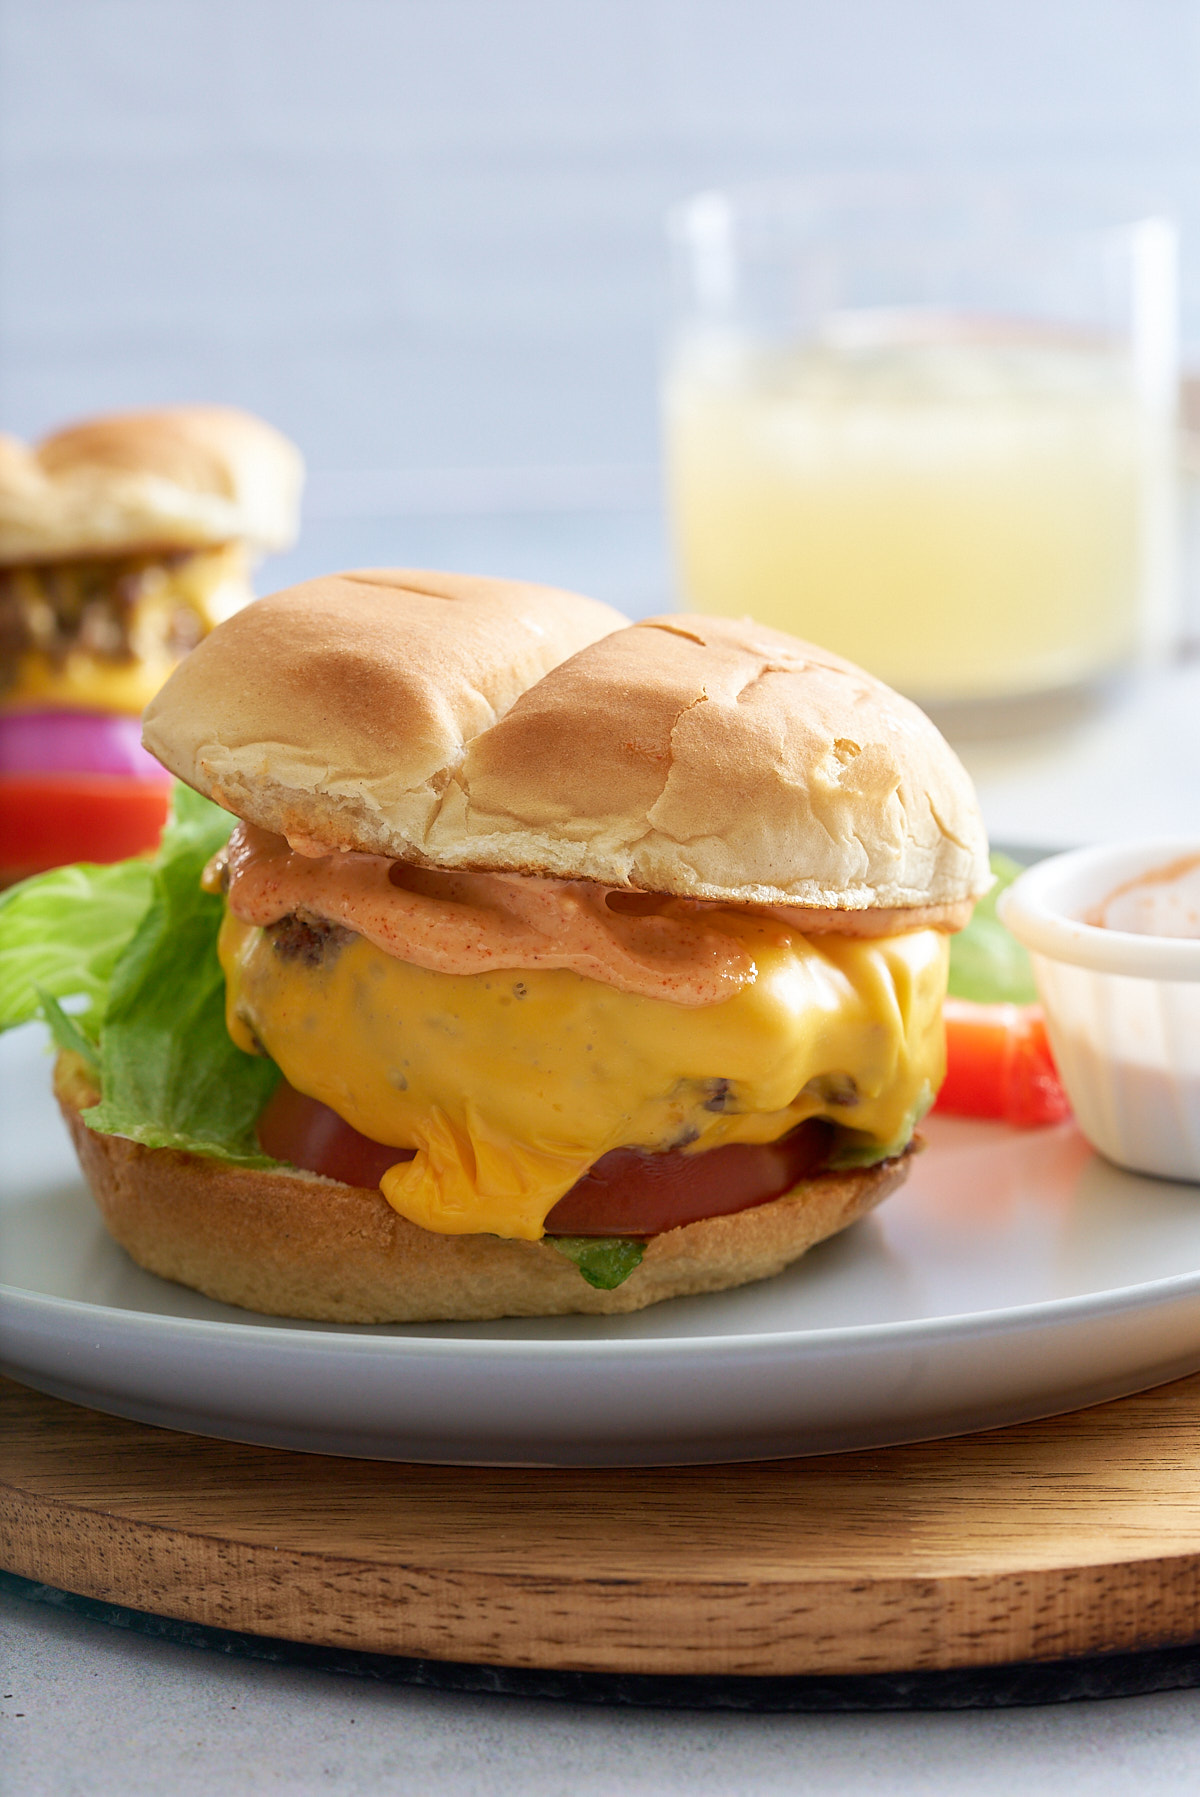
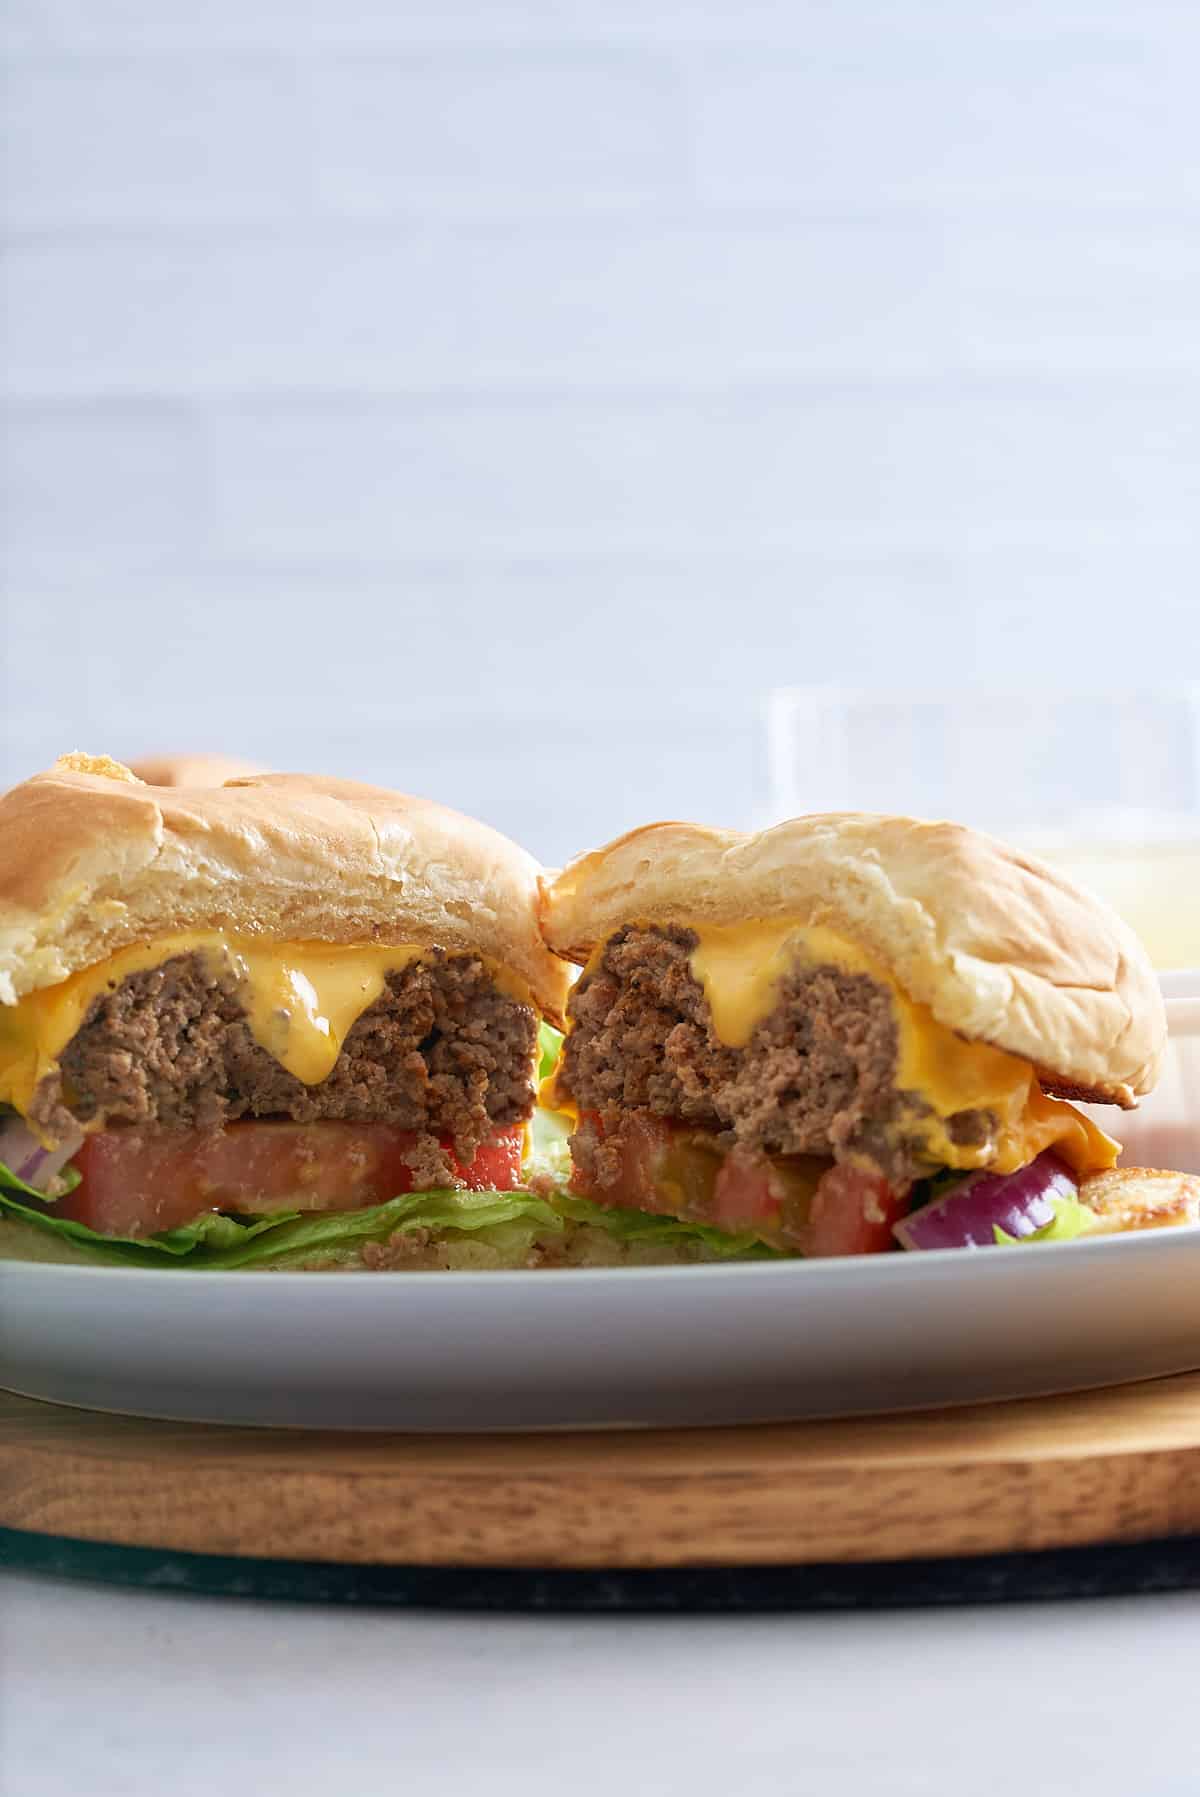
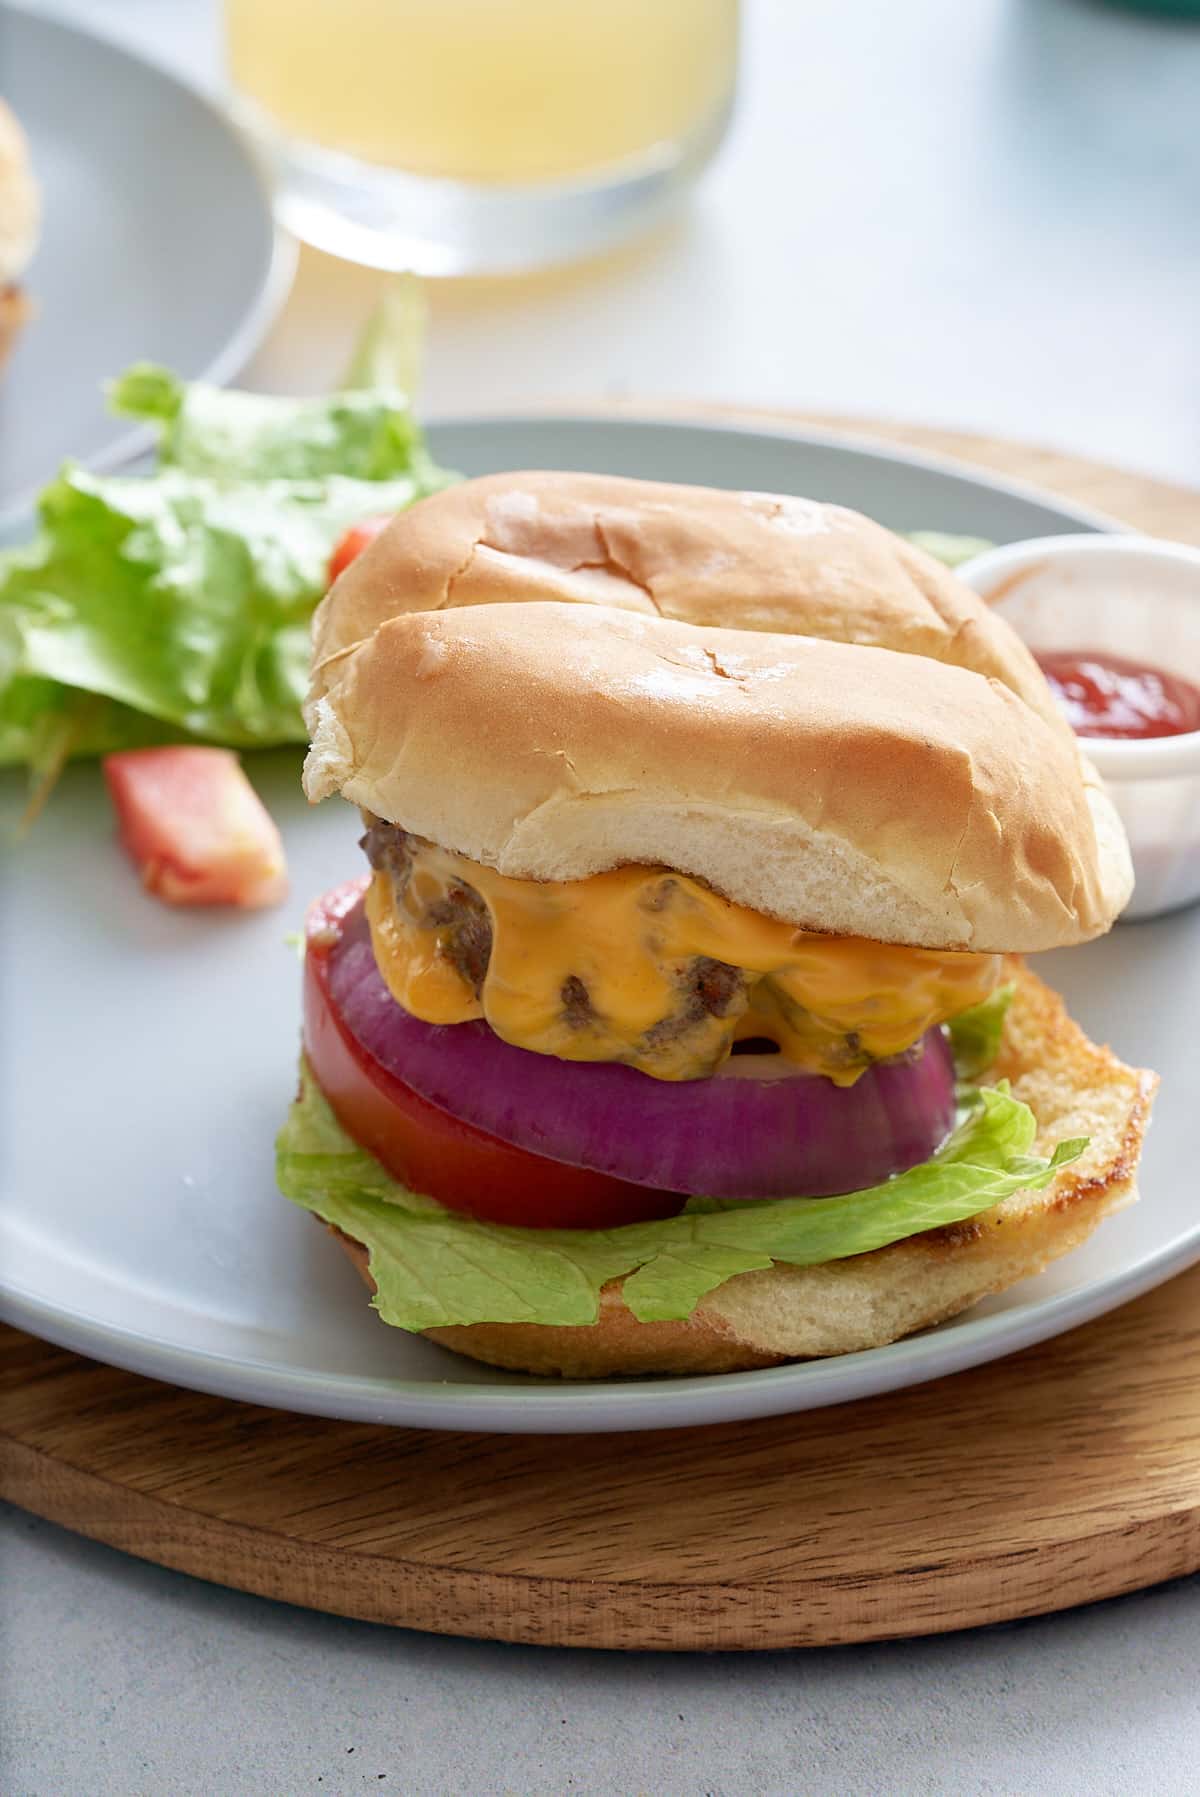
Discover burger bliss with these steamed cheeseburgers. Tender, juicy, and expertly steamed, it's topped with melted cheese, nestled in a soft bun with fresh toppings.
You’ll find the full recipe with ingredient amounts and instructions in the recipe card at the bottom of this post. Be sure to check out the blog post itself for extra tips and tricks!
I've been loving my steamer, and what I love most is that you can use it for many more things than steaming vegetables.
When a grill isn't accessible, or the weather is less than fair, you can still enjoy a good burger inside without smoking up the house by pan-frying. Not only that, steaming allows the beef fat to melt away, leaving you with a lean but still juicy burger.
You'll be surprised how many things you can steam, and still maintain delicious flavor! My steamed lobster tails, for instance, are tasty and perfectly cooked.
Steamed Cheeseburger Ingredients
Ingredient amounts and full recipe instructions are on the printable recipe card at the bottom of the post.
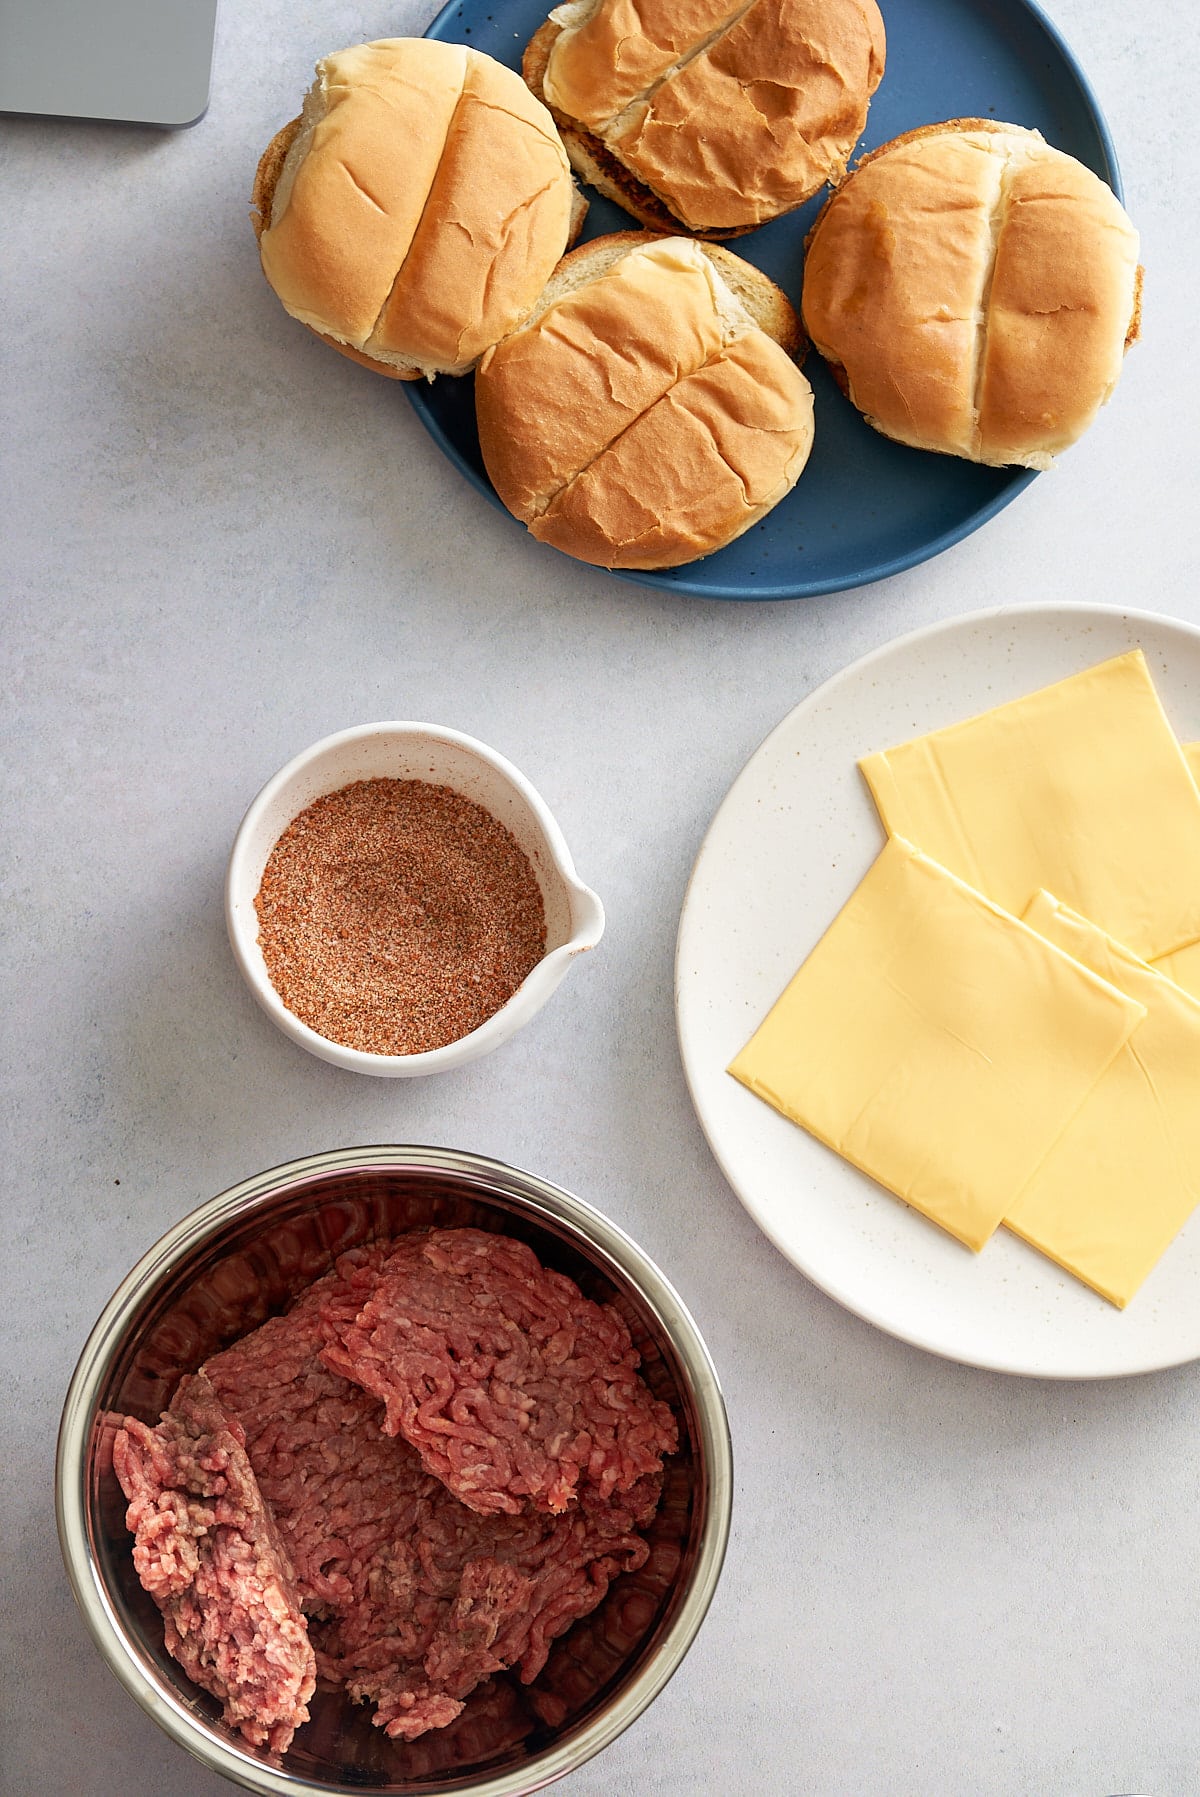
- Lean ground beef - lean beef rather than regular beef will still yield a juicy burger. The process of steaming adds back the moisture that the fat would have otherwise provided.
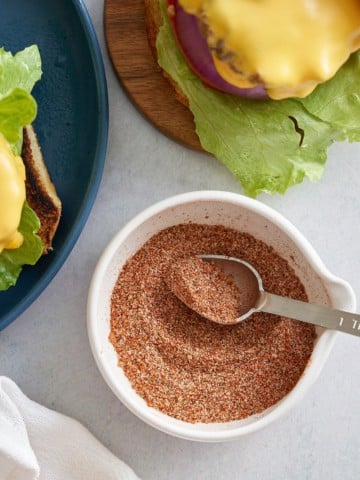
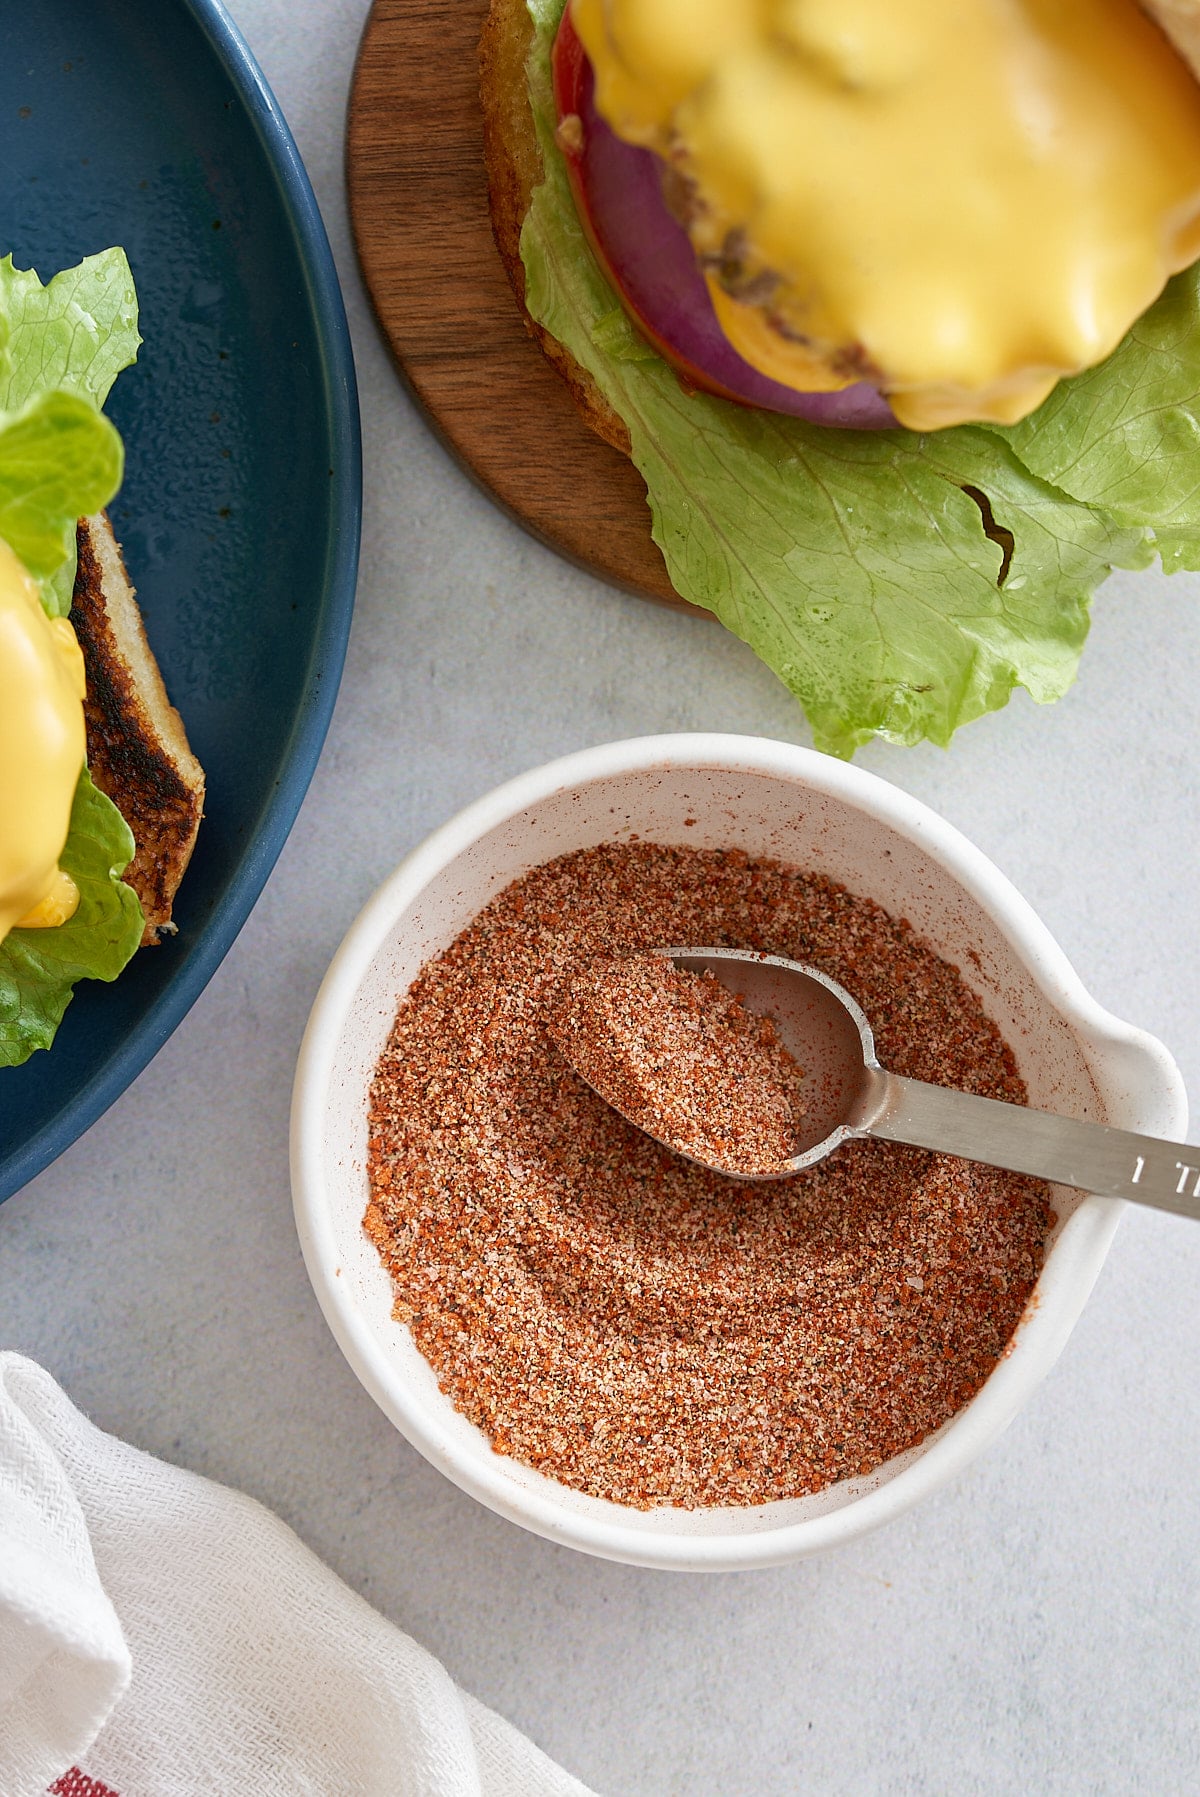
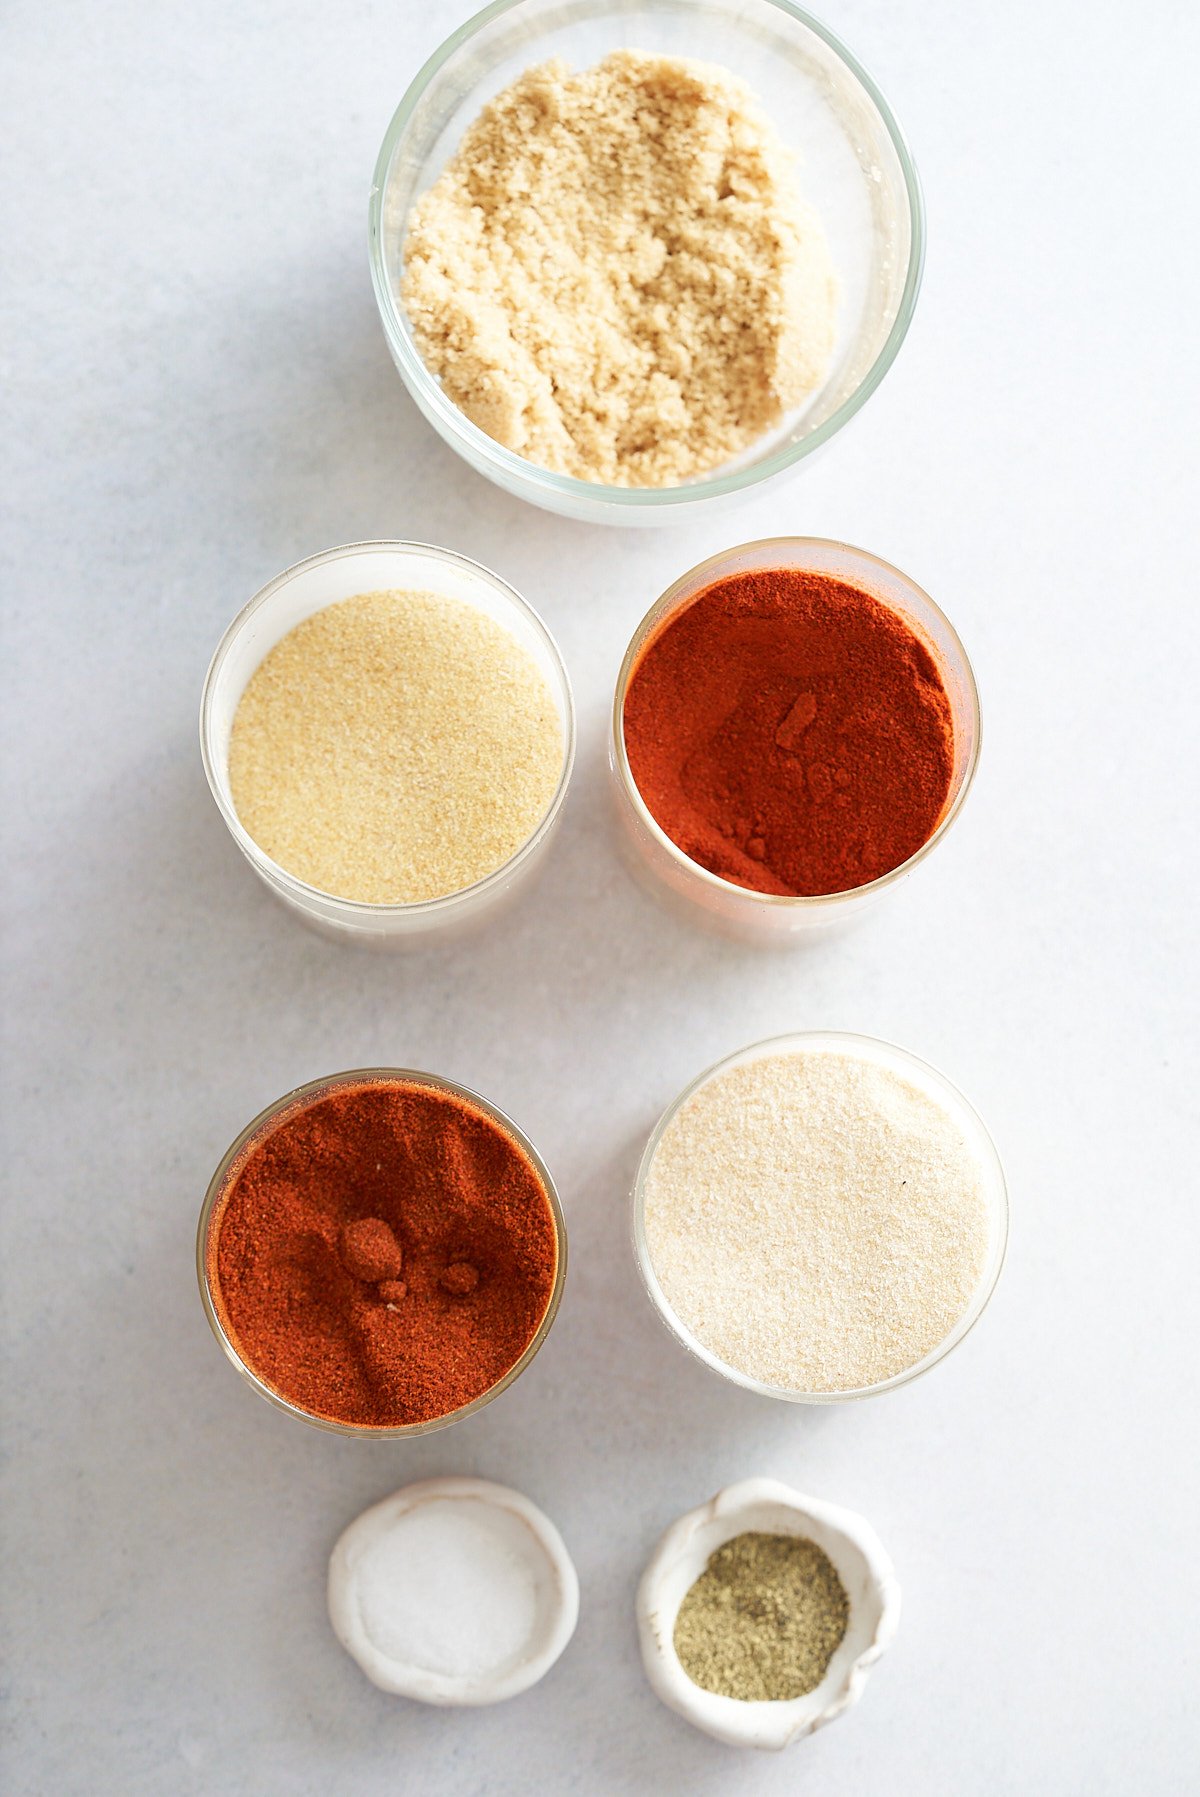
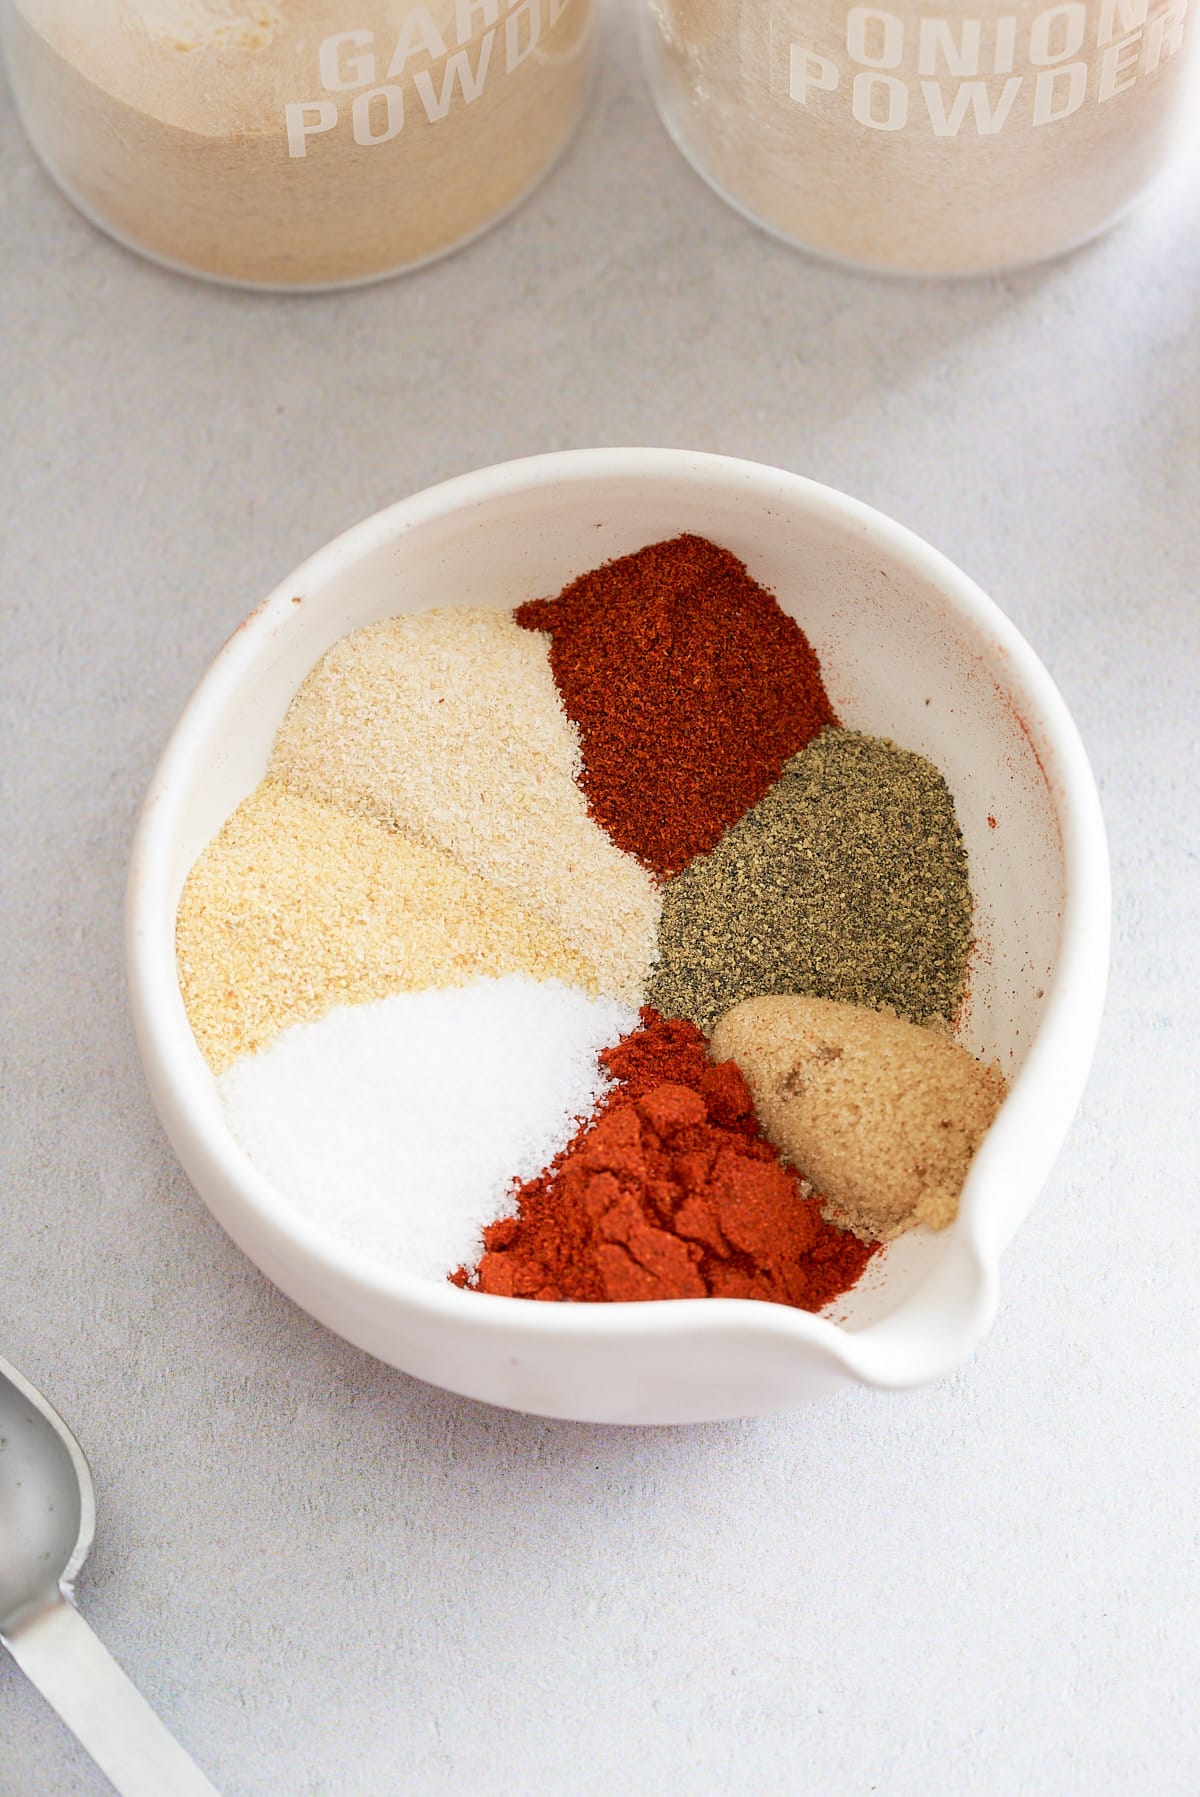
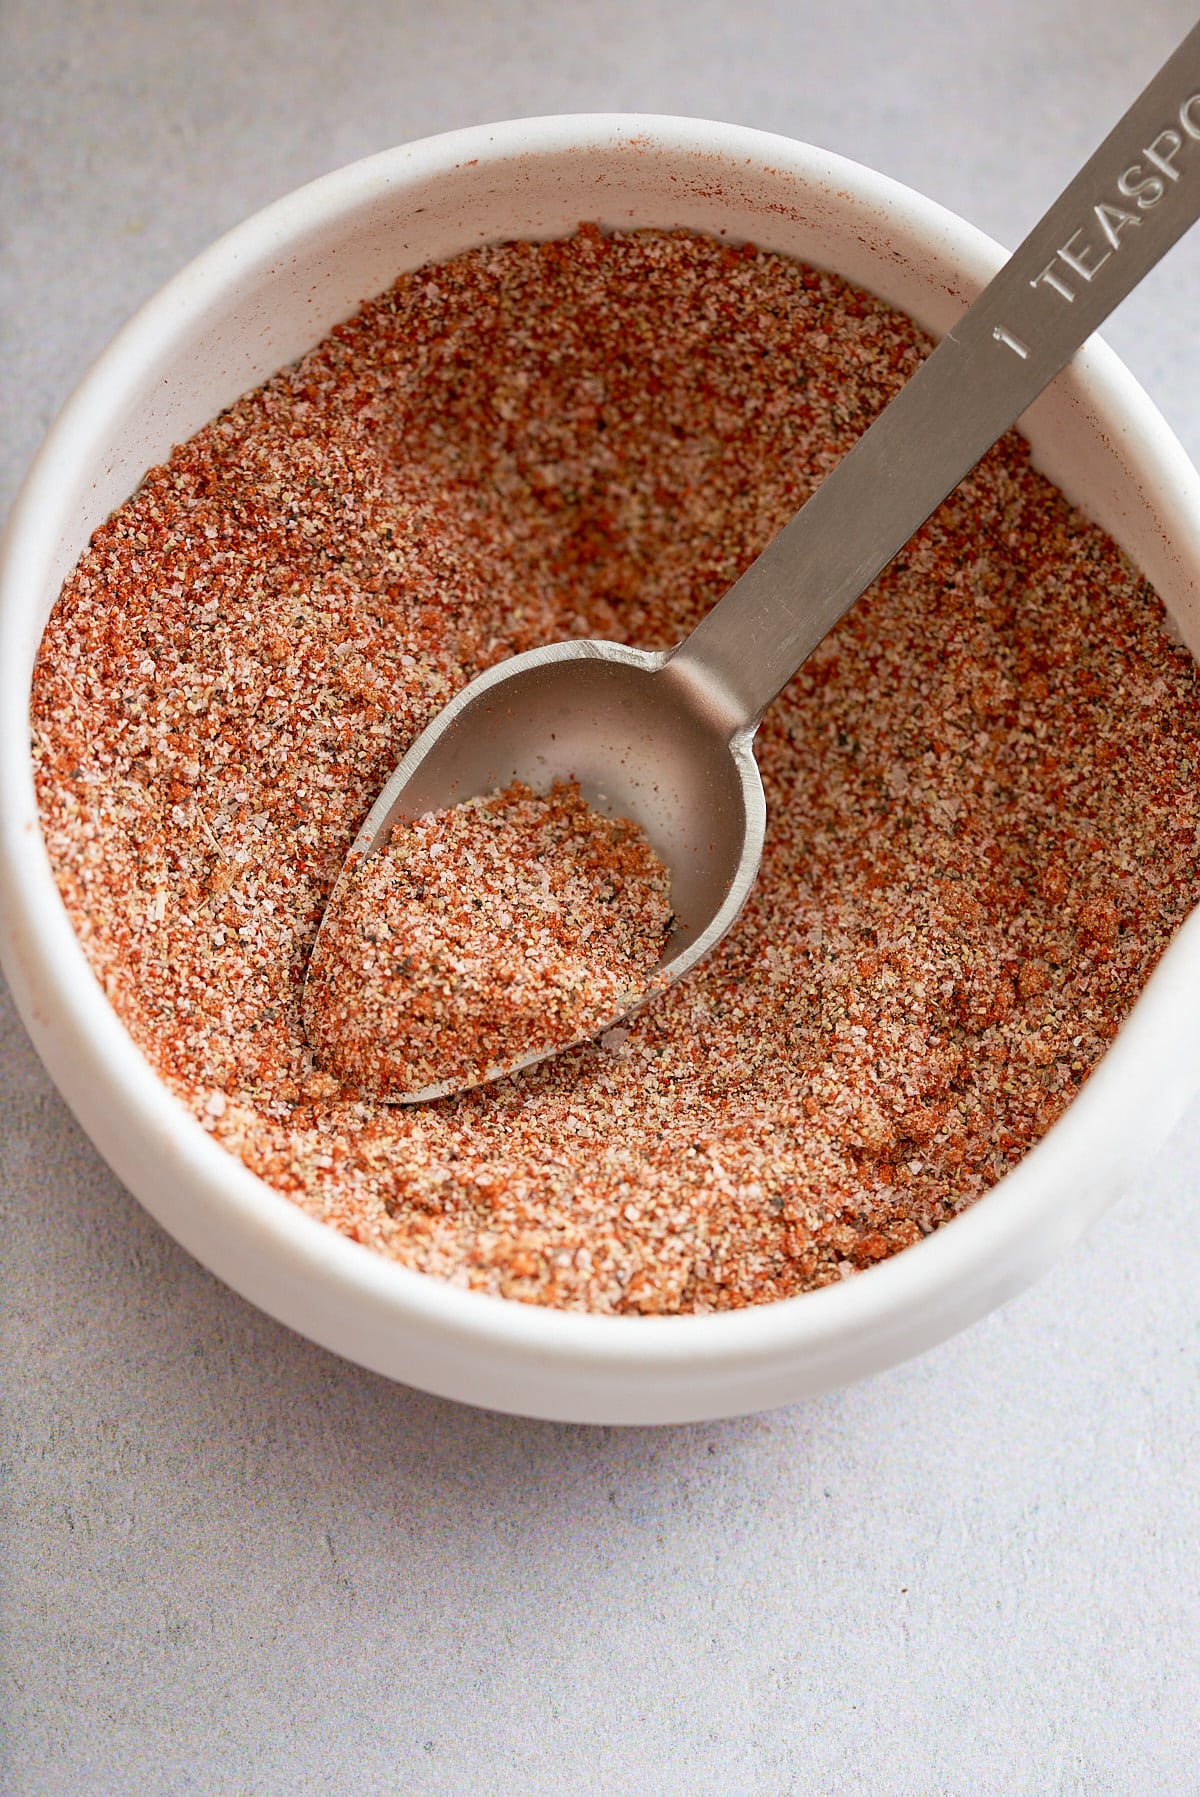
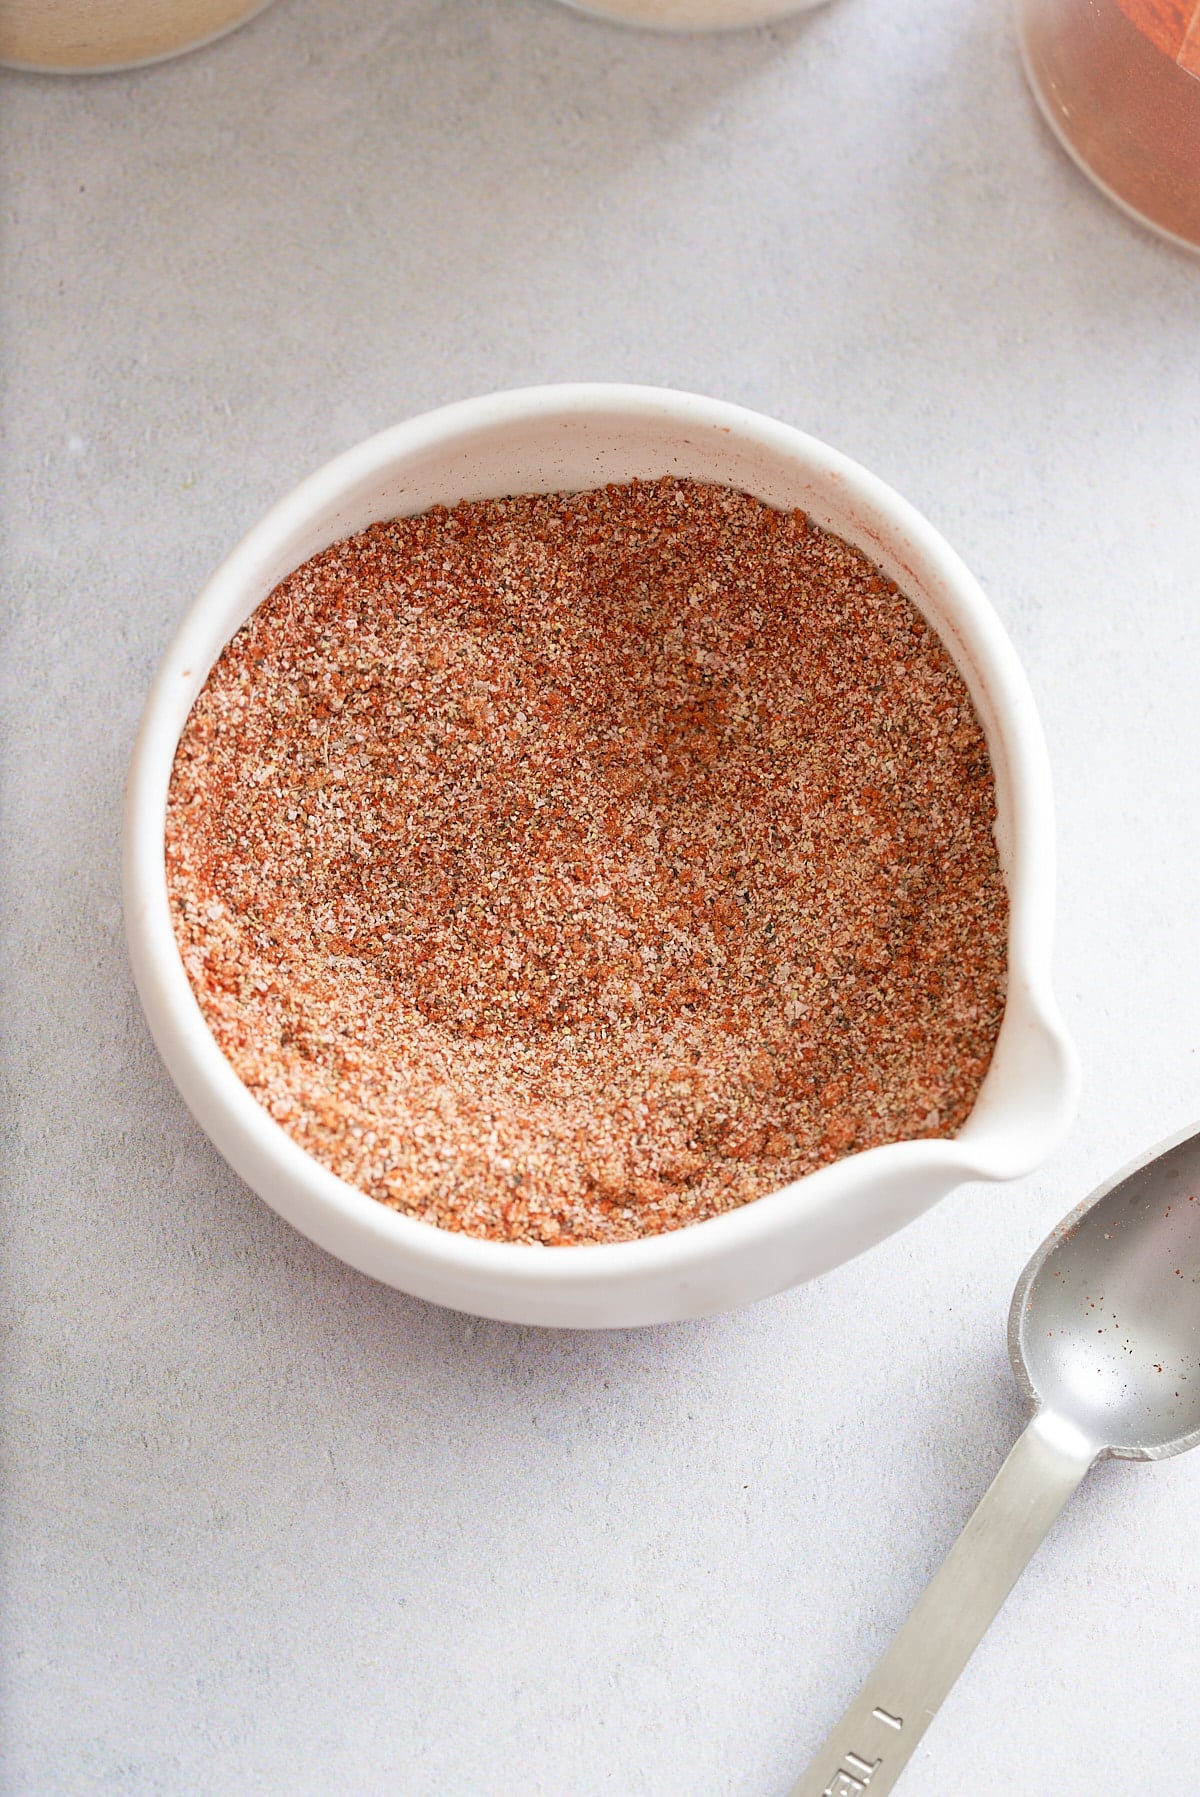
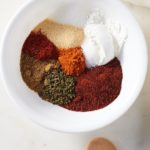
- Hamburger seasoning or your preferred seasoning - Use a simple salt and pepper blend, or opt for my homemade hamburger seasoning that will elevate your burger to the next level!
- Hamburger buns - I've used split-top buns here, but feel free to use your preferred type.
- Cheese - Our favorite is a fresh slice of cheddar cheese, but any cheese, such as provolone, Swiss, Muenster, or even a smoky Gouda, will do just fine.
- Burger toppings and condiments- Lettuce, tomato, onion, pickles, spicy mayonnaise, ketchup, mustard, or even bacon.
Recommended Tool for this Recipe

This everyday steamer is perfect for steaming meats and vegetables.
- Steamer basket
- Mixing bowl for meat and seasonings
How To Make Steamed Cheeseburgers
Step 1: Gather your ingredients. Then, fill a steamer basket with 1 inch of water, ensuring the water does not touch the bottom of the basket. Bring the water to a simmer over medium heat.
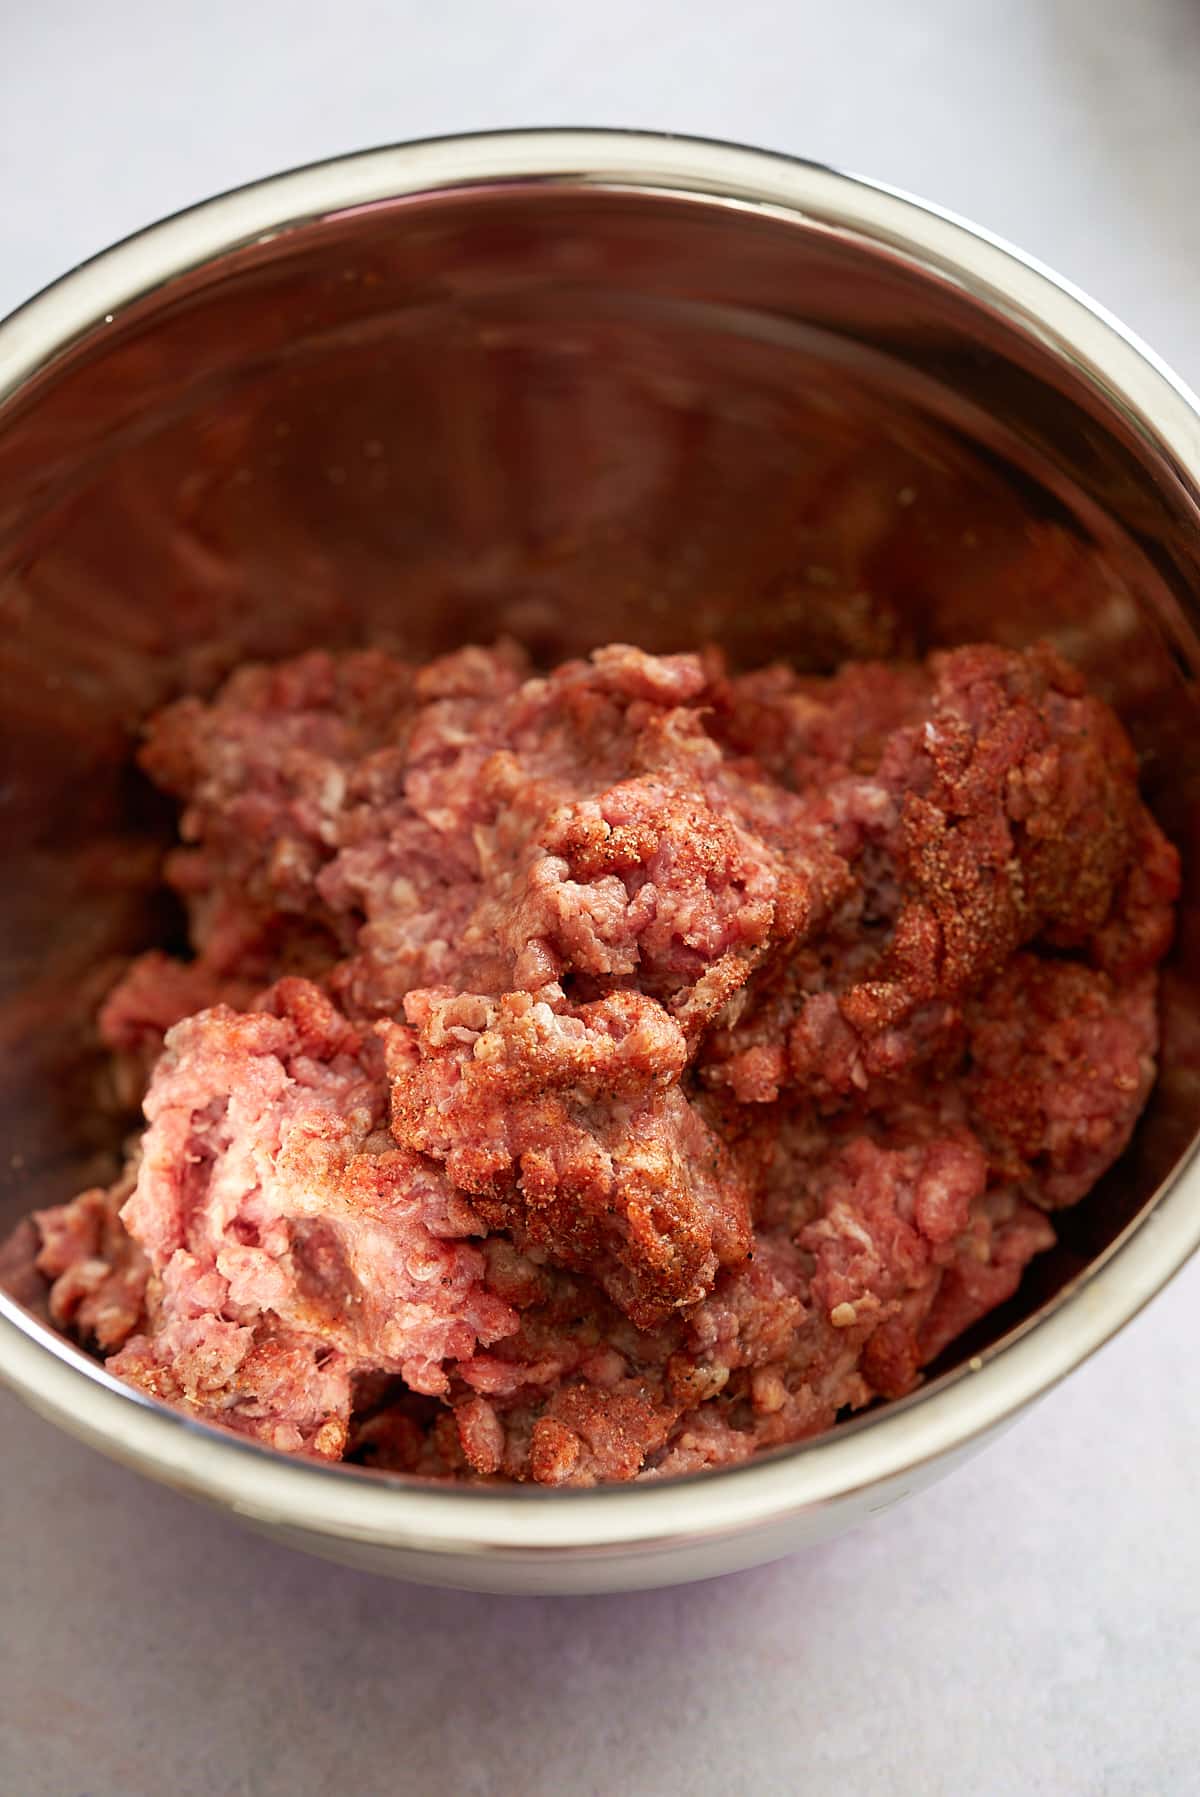
Meanwhile, in a mixing bowl, combine the ground beef and hamburger seasoning. Mix well, but avoid overworking the meat, as it can make the burgers tough.
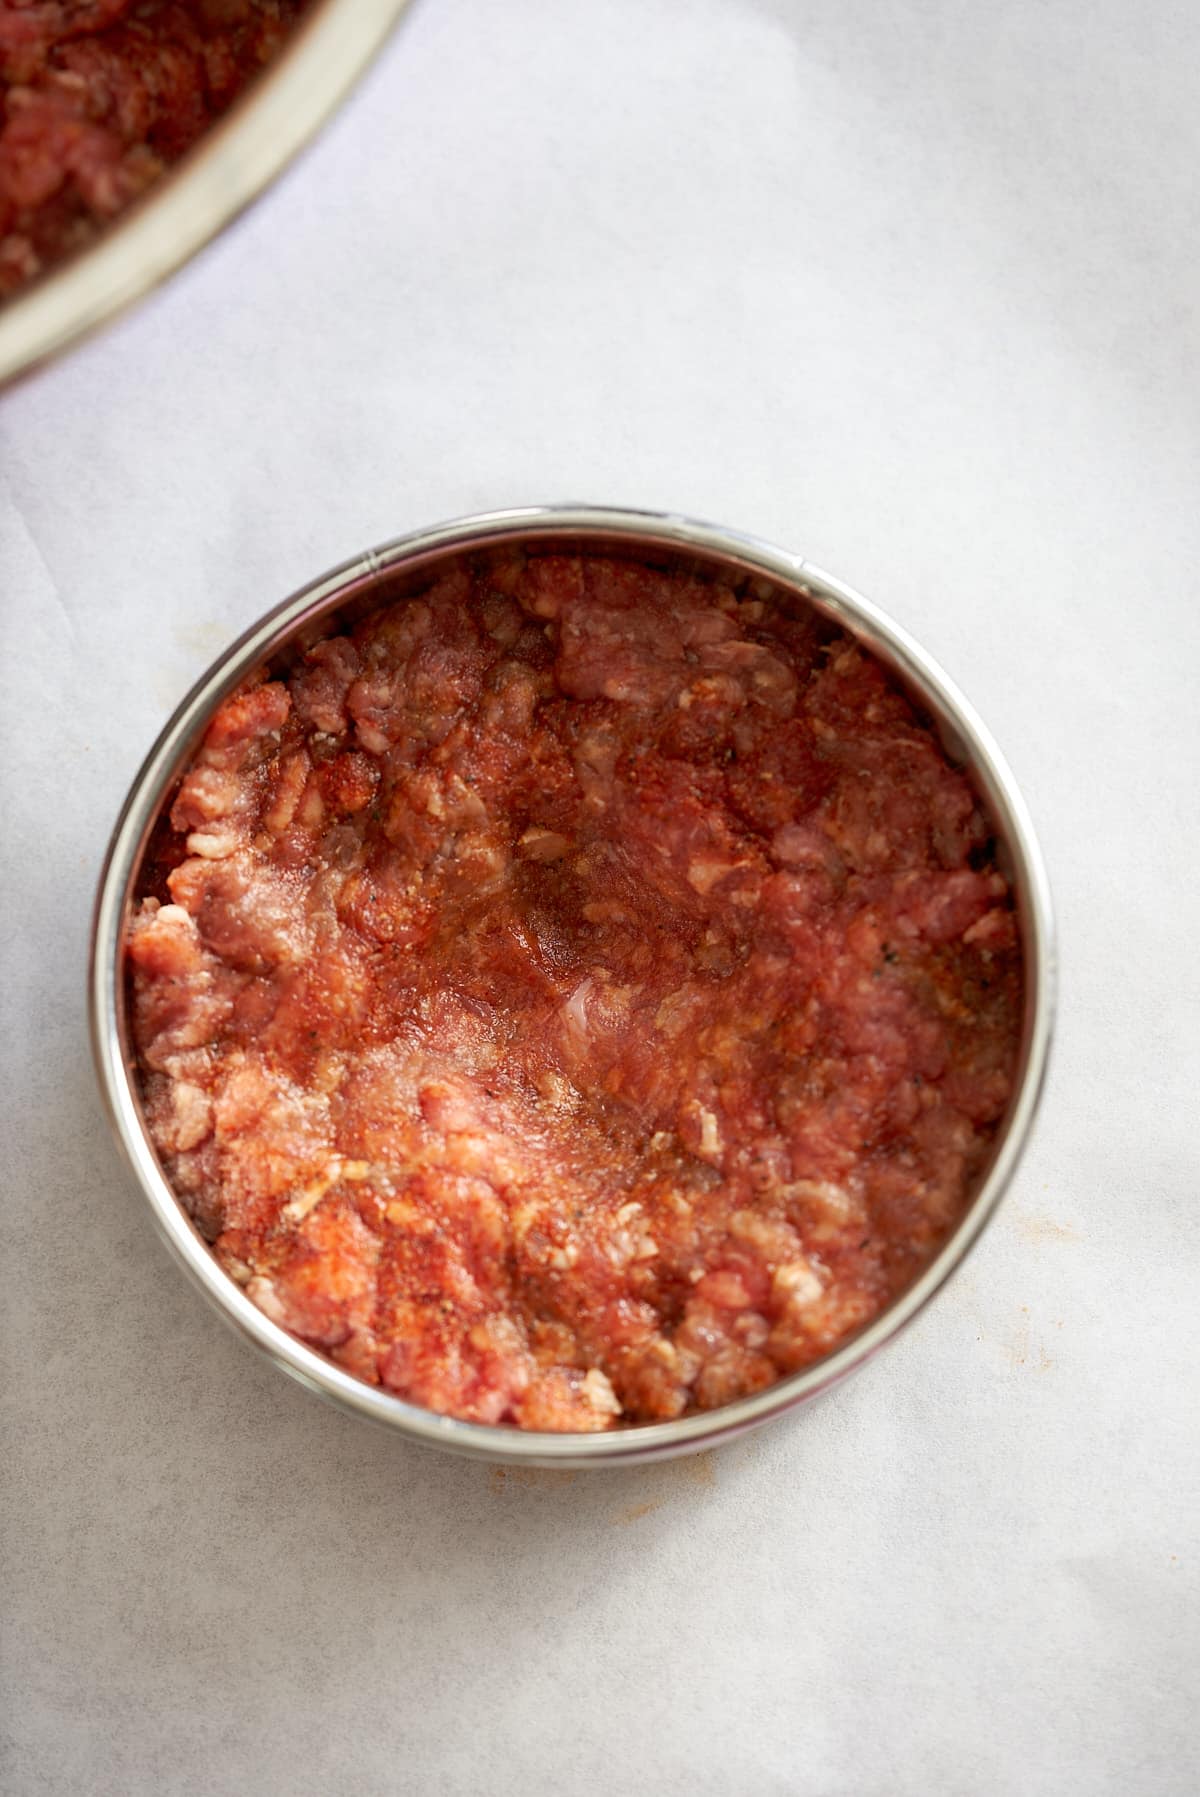
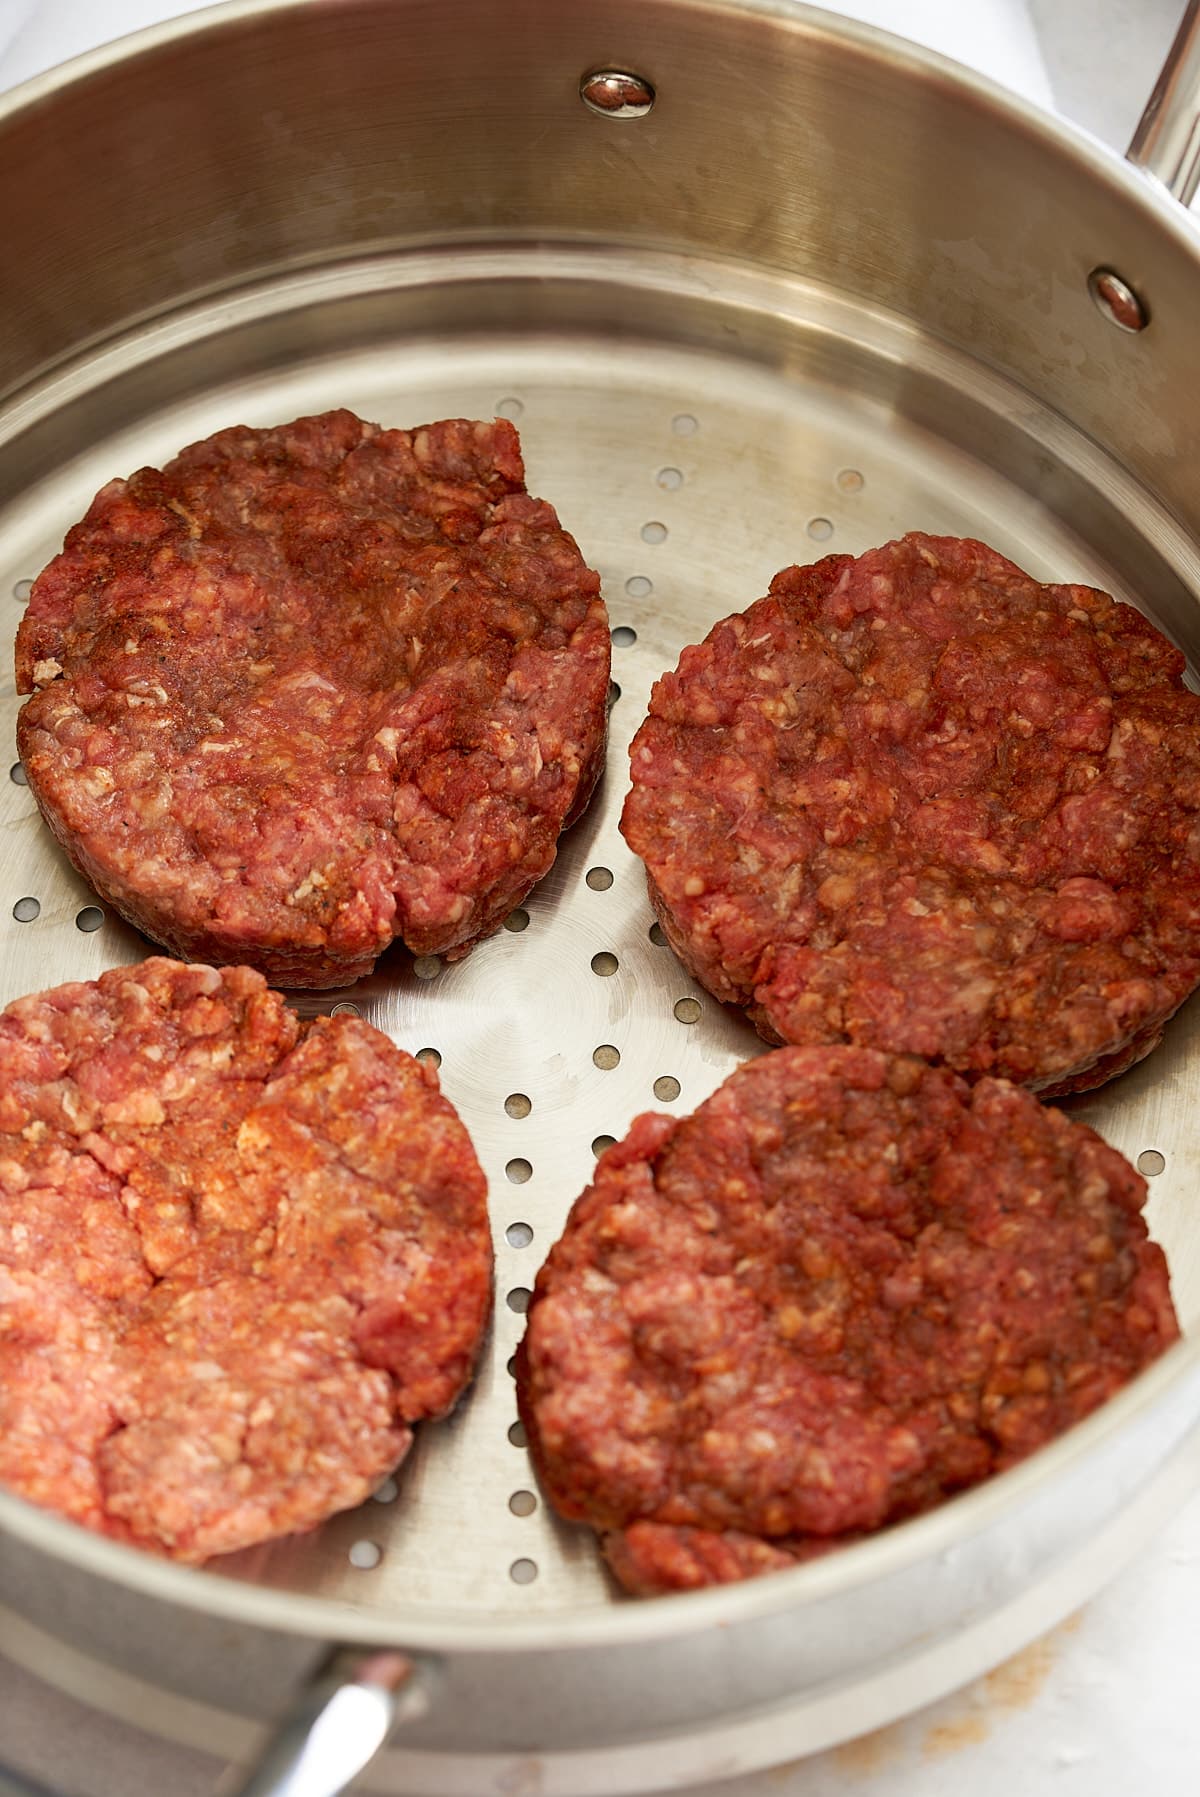
Step 2: Divide the meat mixture into 4 equal portions, each about ¼ pound, and shape each portion into a patty that matches the size of your hamburger buns. Press your thumb in the center of each patty to create a slight indentation. This will help the patties cook evenly.
I use a biscuit cutter that is the same size as my burger bun to shape each burger.
Step 3: Place the patties in the steamer basket in a single layer.
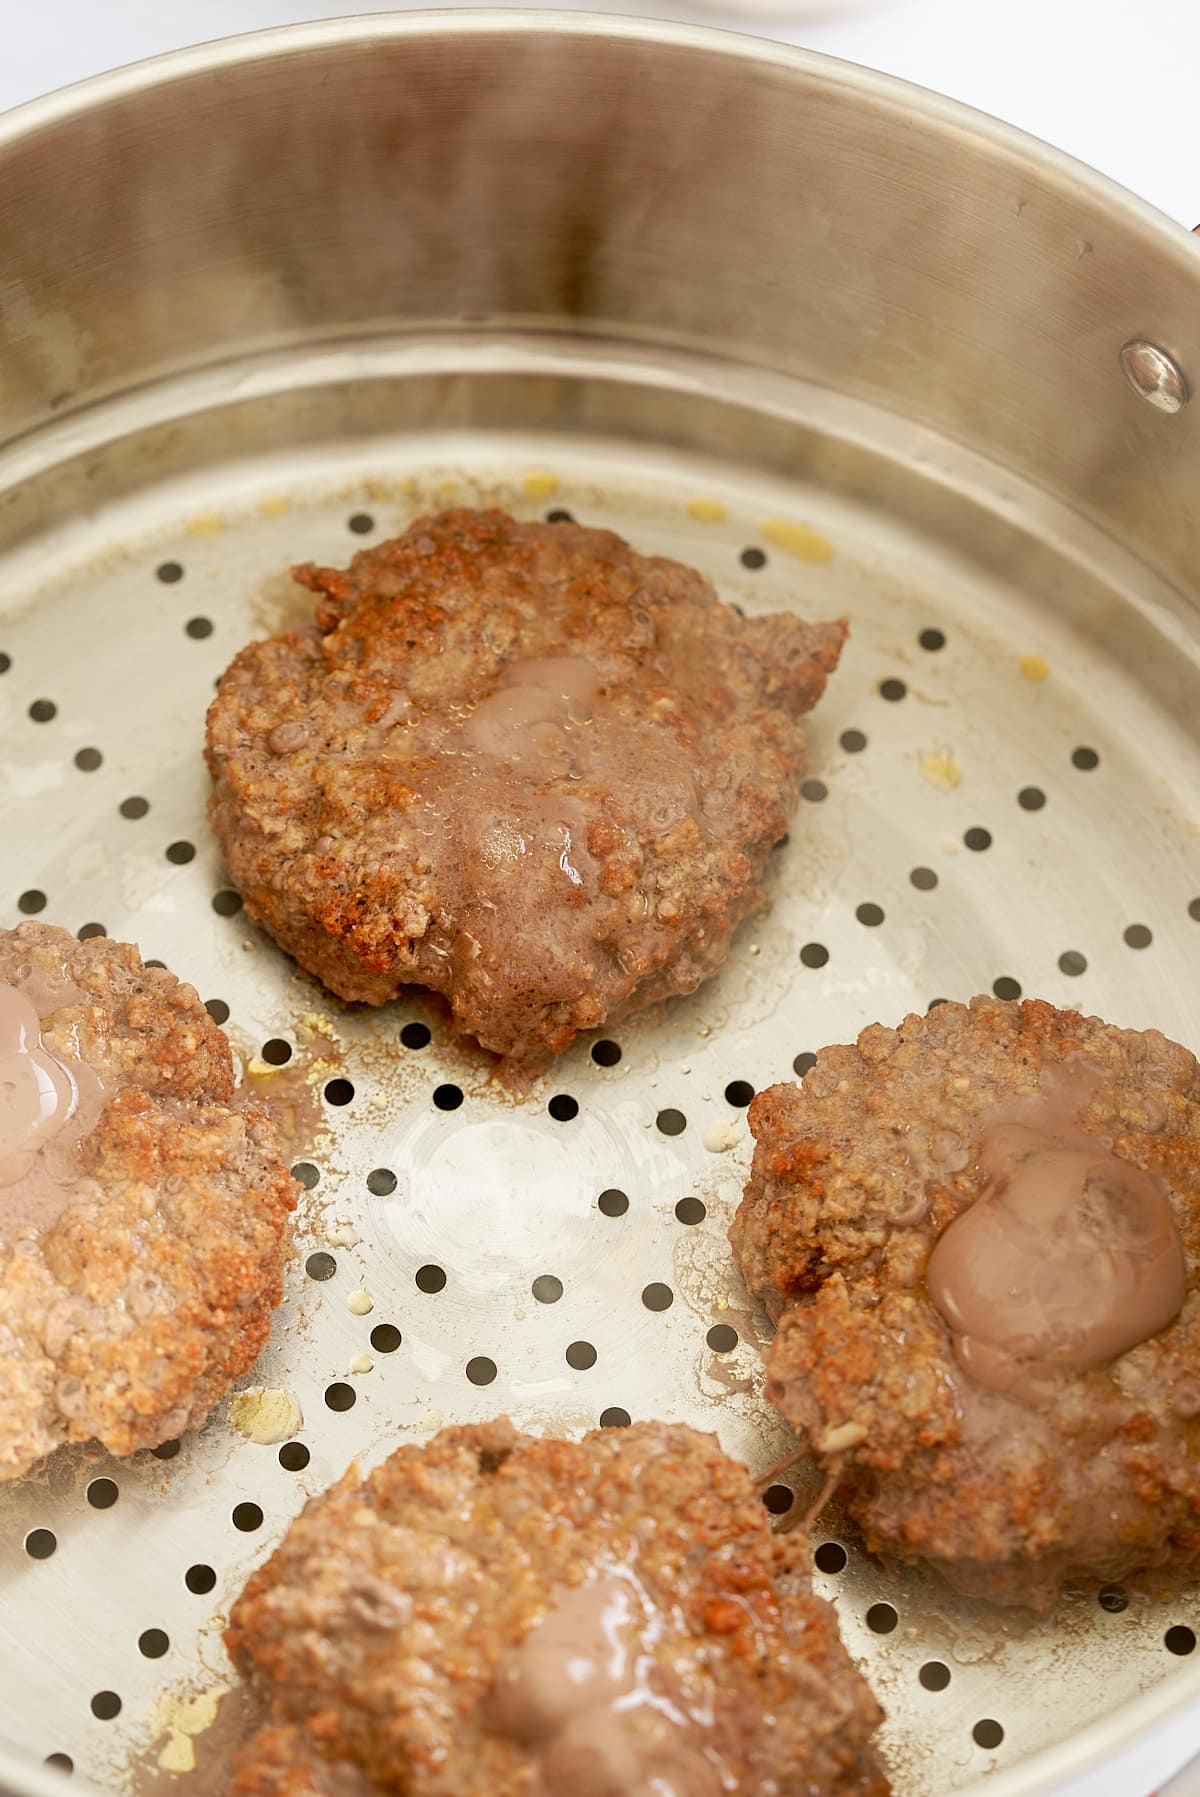
Cover the pot with a lid and steam the patties for about 8 minutes. While the patties are steaming, you can prepare your hamburger buns.
Split them open and lightly toast them if desired. You can also add your desired burger toppings, such as lettuce, tomato slices, onion slices, and pickles.
Step 4: After 8 minutes, remove the steamer from the heat, open the lid, and top the burgers with cheese. Cover the steamer basket and leave it covered for 1 minute.

Step 5: Assemble your steamed cheeseburgers by placing each patty with melted cheese on the bottom half of a hamburger bun. Add your desired toppings and cover with the top half of the bun.
Serve and enjoy 🙂
How to store steamed cheeseburgers
Storing Leftovers
Let the steamed burgers cool to room temperature, then place them in an airtight container or a resealable zip‑top bag for up to 3–4 days.
Freezing
Cool the burgers completely, wrap each patty (and its cheese) individually in plastic wrap, and seal them in a freezer-safe zip-top bag. Freeze for up to 2 months.
Thaw overnight in the refrigerator and reheat by gently steaming or microwaving until the internal temperature reaches 160 °F (71 °C).
What to serve with Steamed Cheeseburgers
When serving steamed cheeseburgers, you can pair them with a variety of delicious side dishes to create a well-rounded meal. Here are a few options that pair well with steamed cheeseburgers:
- French Fries: Air fryer French fries, or even these KFC potato wedges!
- Coleslaw: Perfect for burgers, try my broccoli slaw, Jamaican coleslaw, or this tasty but straightforward coleslaw recipe.
- Salad: For a lighter option, consider a fresh garden salad or a Caesar salad for a refreshing balance. Also, try a creamy Southern-style macaroni salad, a Hawaiian-style macaroni salad, or this hearty Southern potato salad.
- Pickles: A classic accompaniment to burgers! Try these air fryer fried pickles, or my quick refrigerator pickles.
- Sweet Potato Wedges or Slices: If you prefer a healthier alternative to fries, sweet potato wedges or slices are a fantastic choice.
- Corn on the Cob: In the summer months, grilled or steamed corn on the cob is a great side dish. Try this flavorful Mexican corn on the cob or this cheddar and sour cream corn on the cob.

Where did steamed burgers come from?
Steamed burgers are believed to have originated from Jack's Lunch in central Connecticut in the early 1900s, steamed in a copper box 18 stacks tall. If you wanted cheese, it was an additional 5 cents.
While steamed cheeseburgers aren't a common thing you'll find in restaurants around America, you can still enjoy a juicy steamed burger at the more popular Ted's Restaurant in Connecticut and some surrounding cities.
FAQ's
Due to the lack of oil, butter, and fats, steaming cheeseburgers is a healthier option. During the steaming process, the fats inside the meat are melted away into the water below and replaced with the moisture the water provides. Leaving a juicy but lean cheeseburger.
You can steam frozen burger patties, but be aware that the cooking time may vary. It is recommended to check the internal temperature of the burgers before serving. Additionally, depending on the size of your frozen burger patties, you may only be able to fit 2 or 3 in the steamer basket.
It's called scum, and it's a mix of protein and water. It's harmless and can simply be wiped off if you prefer not to eat it.
Tanya's Notes
- Burgers are done when the internal temperature reaches 160°F (71 °C). Use a quick-read thermometer to check the temperature.
- If you don't have a steamer pot, add 1 inch of water to a Dutch oven or deep skillet, bring to a simmer, then set a folding steamer basket just above the waterline—patties shouldn’t sit in liquid. A tight‑fitting lid is key for even, moist heat.
Looking for more delicious recipes? Try these out:
- Juicy Air Fryer Turkey Burgers
- Air Fryer Frozen Hamburgers
- Korean Sloppy Joes
- Southern Tomato Sandwich
- Shredded Italian Beef Sandwiches
If you have tried this recipe or any other recipe on my blog, please rate it and let me know how it turned out in the comments below!

Steamed Cheeseburgers
Equipment
Ingredients
- 1 pound Lean ground beef
- 1 tablespoon Hamburger seasoning or seasoning of choice
- 4 Hamburger buns
- 4 slices of Cheese
- Burger toppings lettuce, tomato, onion, pickles, spicy mayo, etc
Instructions
- Fill a steamer basket with 1 inch of water, making sure the water won’t touch the bottom of the basket. Bring the water to a simmer over medium heat.
- Meanwhile, in a mixing bowl, combine the ground beef and hamburger seasoning. Mix well, but avoid overworking the meat, as it can make the burgers tough.
- Divide the meat mixture into 4 equal portions, about ¼ of a pound each, and shape each portion into a patty that matches the size of your hamburger buns. Press your thumb in the center of each patty to create a slight indentation. This will help the patties cook evenly.
- Place the patties in the steamer basket in a single layer.
- Cover the pot with a lid and steam the patties for about 8 minutes. While the patties are steaming, you can prepare your hamburger buns. Split them open and lightly toast them if desired. You can also add your desired burger toppings like lettuce, tomato slices, onion slices, and pickles.
- After 8 minutes, remove the steamer from the heat, open the lid, and top the burgers with cheese. Cover the steamer basket and leave it covered for 1 minute.
- Assemble your steamed cheeseburgers by placing each patty with melted cheese on the bottom half of a toasted hamburger bun. Add your desired toppings and cover with the top half of the bun.